
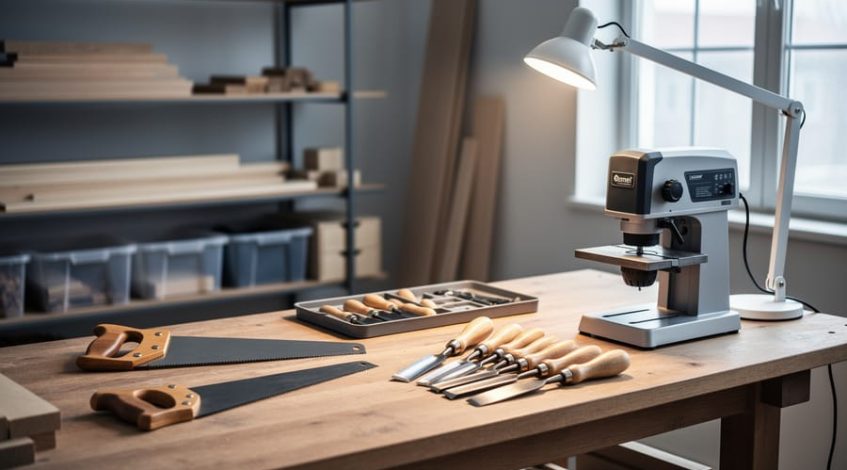
A beginner woodworking setup requires just five essential hand tools, one versatile power tool, a stable work surface, and about 50 square feet of organized space to safely complete most starter projects. You can build this foundation for under $400 in 2026 by prioritizing quality hand tools over dozens of specialty machines, and you’ll be cutting, joining, and finishing real furniture within your first weekend.
The right setup isn’t about filling a garage with every tool you’ve seen on YouTube. It’s about understanding which tools perform multiple functions, how to arrange them for safety and efficiency, and where to invest versus where to save. Most beginners overspend on equipment they won’t use for months while skipping the unsexy essentials like proper dust collection and adequate lighting that actually determine whether you’ll stick with the craft.
This guide walks you through building a workspace that grows with your skills rather than overwhelming your budget or square footage. You’ll learn which tools belong in your first purchase, how to set up each station to prevent common injuries, and how to verify your space is genuinely ready for safe, productive work. We’ll also show you how to source reclaimed lumber and vintage tools that reduce your environmental footprint while giving you better materials than big-box stores offer beginners.
Whether you’re converting a corner of your basement or claiming half the garage, the same principles apply: start with versatile tools that teach fundamental techniques, organize around your most common workflows, and build quality habits before adding complexity. Get these foundations right, and you’ll avoid the expensive mistakes that derail most new woodworkers before they finish their third project.
Essential Tools and Materials for Your First Workshop
Hand Tools That Form Your Foundation
Your foundational hand tools form the bedrock of any beginner woodworking setup and deserve careful selection. Start with four essential chisels in 1/4″, 1/2″, 3/4″, and 1″ widths, these cover 90% of typical joinery work. A quality crosscut hand saw and a block plane complete your cutting and shaping toolkit. Add a 16-ounce claw hammer for assembly, at least four bar clamps in varying lengths, and a combination square paired with a tape measure for accurate marking.
Don’t overlook the value of used tools. Estate sales, antique shops, and online marketplaces often yield vintage chisels and planes that outperform modern budget options once cleaned and sharpened. Look for tools with intact handles, minimal pitting on metal surfaces, and straight, unchipped cutting edges. A rusty Stanley plane from the 1950s typically needs only rust removal and a fresh edge to perform beautifully for decades.
Building a starter woodworking kit around hand tools teaches fundamental techniques while keeping costs manageable. Care for these tools sustainably by using citrus-based rust removers instead of harsh chemicals, sharpening blades yourself rather than replacing them, and storing tools in a dry environment with light oil protection. Hand tools rarely break and almost never become obsolete, making them the most environmentally responsible investment in your workshop.
Power Tools Worth the Investment
Three power tools will carry you through most beginner woodworking projects without breaking the bank. Start here, master these, then expand based on what you’re actually building.
A corded circular saw delivers the most versatility for your first power tool purchase. You’ll use it to break down full sheets of plywood, cut lumber to rough length, and make quick crosscuts and rip cuts. Expect to spend $60, $120 for a reliable 7¼-inch model with adequate power for hardwoods. Corded beats cordless at this stage because you’re working in a fixed workshop where outlets are accessible, and corded saws offer consistent power without battery anxiety. A miter saw offers more precise crosscuts, but it can’t rip boards or handle sheet goods, which makes the circular saw the better foundation tool.
Your drill/driver is the workhorse you’ll grab daily. An 18-volt cordless model gives you freedom to move around your workshop and clamp workpieces without wrestling cords. Look for a brushless motor and at least two batteries so one can charge while you work. This tool handles drilling pilot holes, driving screws, mixing finishes, and even light sanding with the right attachments. Budget $100, $150 for a kit with two batteries and a charger.
The random orbital sander finishes the trio. Hand-sanding works, but this tool saves hours on every project while delivering smoother results. A corded 5-inch model provides consistent power for under $50. The random orbit pattern eliminates the cross-grain scratches that belt sanders and sheet sanders leave behind, which matters when you’re learning to read grain direction and applying your first finishes.
Materials to Keep on Hand
Start with softwoods like pine or poplar, they’re forgiving, affordable, and widely available from sustainable forestry sources. Visit local lumber yards or salvage stores for offcuts and reclaimed boards; these cost-effective pieces are perfect for practicing cuts and joinery without guilt over mistakes.
Stock basic fasteners: wood screws in various lengths (1¼”, 2″, and 3″ cover most beginner projects), finishing nails, and pocket-hole screws if you plan to use that joinery method. Keep a quality wood glue like Titebond on hand, it’s stronger than the wood itself when properly applied.
For finishes, start simple: food-safe mineral oil or beeswax for cutting boards, water-based polyurethane for general protection, and danish oil for an easy hand-rubbed finish. Buy small quantities until you know your preferences.
Reclaimed pallet wood, salvaged fence boards, and construction site offcuts provide excellent practice material. They teach you to work around knots, warping, and imperfections, skills that translate directly to premium lumber later.
Critical Safety Practices and Protective Equipment
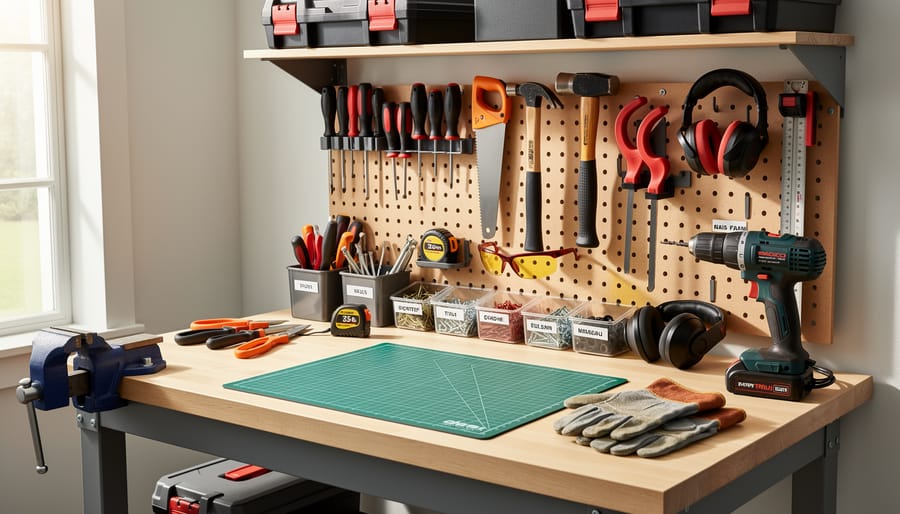
Safety is the foundation of every successful beginner woodworking setup, and protective equipment should be your first investment before bringing a single tool into your workspace. These aren’t optional extras or upgrades to consider later. Without proper safety gear and practices, your woodworking journey can end before it truly begins.
Personal Protective Equipment: Your Non-Negotiable Essentials
Eye protection comes first. Flying wood chips, sawdust, and debris are constants in any workshop. Invest in ANSI Z87.1-rated safety glasses or, better yet, a full-face shield for operations like routing or turning. Keep multiple pairs on hand so you never skip protection because your glasses are dirty or misplaced.
Hearing protection is equally critical. Prolonged exposure to power tools, especially circular saws, routers, and planers exceeding 85 decibels, causes permanent hearing damage. Use foam earplugs or over-ear muffs rated for at least 25 NRR (Noise Reduction Rating). Your future self will thank you.
Wood dust is more dangerous than most beginners realize. Fine particles from sanding and cutting accumulate in your lungs and create serious respiratory hazards. OSHA requires NIOSH-approved respirators for prolonged dust exposure. Start with an N95 mask at minimum, but upgrade to a reusable half-mask respirator with P100 filters as your projects increase. Dust collection systems come later, but respiratory protection starts now.
Proper clothing matters more than you think. Wear close-fitting garments without loose sleeves, dangling drawstrings, or jewelry that could catch in spinning blades or bits. Long hair must be tied back securely. Steel-toed boots protect against dropped tools and materials.
Workshop Safety Rules and First Aid
Establish clear safety practices from day one. Never operate power tools while fatigued, distracted, or rushed. Keep your workspace clean, as sawdust and offcuts create trip hazards and fire risks. If you’re working in a space that also houses heating equipment, familiarize yourself with fireplace hearth codes to maintain proper clearances for combustible materials.
Stock a dedicated first aid kit with bandages, antiseptic, burn gel, and eye wash solution. Mount a fire extinguisher rated for wood and electrical fires within easy reach. Post emergency numbers visibly, and ensure someone knows when you’re working alone. These preparations cost little but could save everything.
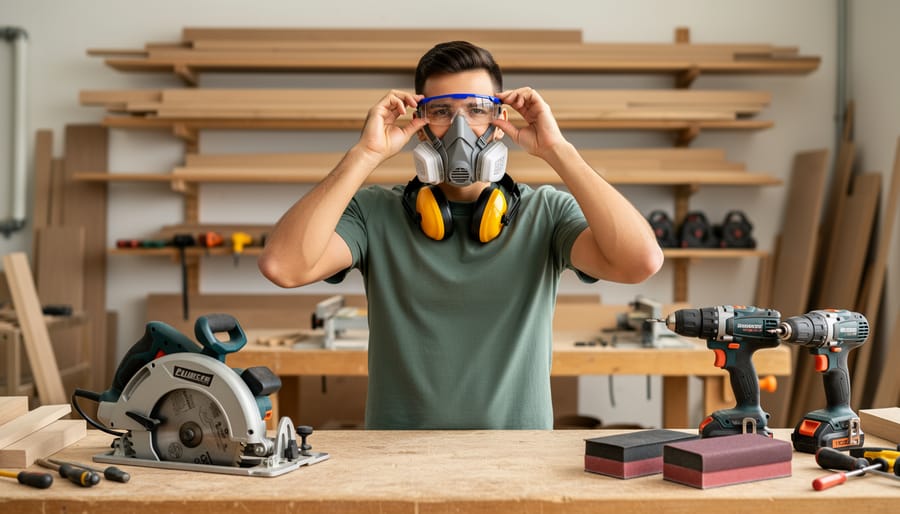
Designing Your Workshop Space: From Garage to Dedicated Room
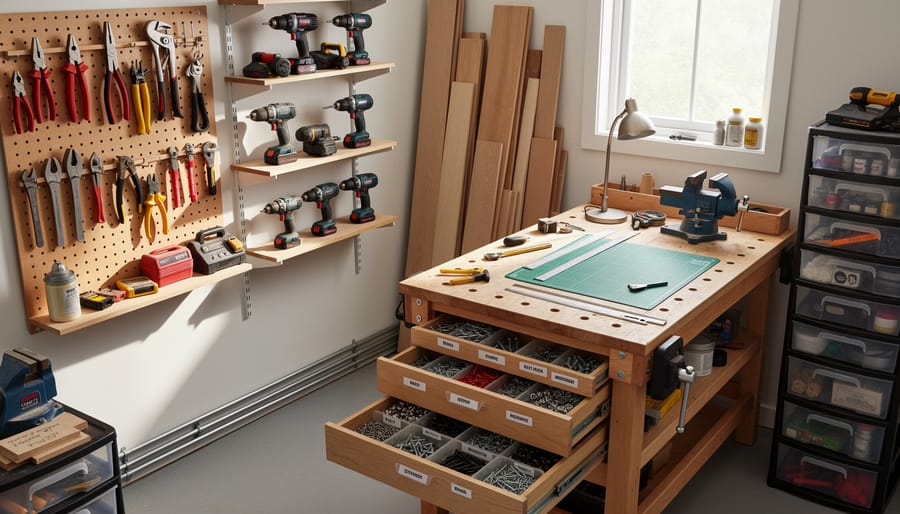
Layout Principles for Beginner Efficiency
Your workshop works best when your three core zones, workbench, tool storage, and material storage, form a tight triangle. Position your main workbench first, then place your most-used hand tools within arm’s reach on one side and power tools on the other. Keep your lumber and sheet goods close enough that you don’t haul materials across the entire space for every cut, but far enough that sawdust doesn’t coat everything.
For small garages or corners of basements, think vertically. Mount pegboards and shelves above your workbench for hand tools. Store lumber upright against walls using simple brackets. A rolling tool cart that tucks under your bench gives you portable access to essentials without eating floor space.
Mobile workstations solve tight quarters beautifully. Build or buy a workbench on locking casters so you can roll it to the center for projects, then push it against a wall when you need to park the car. Some woodworkers use flip-down wall-mounted benches that fold flat when not in use, perfect for shared spaces.
The goal isn’t a fancy layout. It’s reducing wasted steps. If you’re walking ten feet to grab a pencil or change drill bits, you’ll lose momentum and tire faster. Arrange your beginner woodworking setup so common tasks flow naturally: measure at the bench, cut nearby, return to the bench for assembly.
Storage Solutions Using Salvaged Materials
Building storage from salvaged materials transforms a workshop necessity into your first hands-on learning opportunity. You’ll practice measuring, cutting, and assembly while creating exactly what your beginner woodworking setup needs.
Start with free wooden pallets, available behind many retail stores or through community sharing sites. Disassemble them carefully to yield boards for simple wall-mounted shelves. Mount the pallet slats horizontally with brackets to hold hand tools, or stand them vertically as dividers for lumber storage. This teaches you to work with imperfect materials while keeping perfectly usable wood from landfills.
Old kitchen cabinets from renovation projects make excellent small-parts storage. Wall-mount upper cabinets to hold fasteners, sandpaper, and finishing supplies. Lower cabinets with drawers become mobile workstations when fitted with casters salvaged from discarded office chairs.
Your scrap lumber pile becomes tomorrow’s storage solution. Those cutoff pieces from your first projects stack into a simple chisel rack or sawblade holder. Build a rolling cart from plywood scraps to move tools between workstations. Each storage project reinforces fundamental skills like squaring corners and driving screws straight while proving that sustainable practices and practical function work together. You’re not just organizing tools; you’re building the skills that every project ahead will require.
Step-by-Step: Setting Up Your Beginner Workshop
Step 1: Prepare and Clean Your Space
Start by removing everything from your chosen workshop space, boxes, old furniture, stored items, to create a completely empty canvas. Sweep thoroughly, checking for hazards like exposed nails, uneven flooring, or water damage that could affect your projects later. Inspect walls for stability and identify existing electrical outlets; you’ll need at least two dedicated circuits for power tools to avoid tripping breakers mid-cut. Note any lighting gaps now, especially over where your workbench will sit. Check the floor’s levelness by rolling a marble or using a long straightedge, significant slopes mean shims under your workbench legs. If you’re working in a garage, consider whether you’ll need floor mats for concrete comfort during long sessions. This clean slate lets you visualize your layout and spot problems before they interfere with your first free pallet project.
Step 2: Install Essential Infrastructure
Good lighting transforms a frustrating workspace into one where you can actually see your pencil marks and grain direction. Install overhead LED shop lights to achieve at least 75 lumens per square foot, a 10×12 workshop needs around 9,000 lumens total. Position lights to minimize shadows at your workbench; two 4-foot fixtures running parallel to your bench work better than a single centered fixture.
Check your electrical capacity before plugging in power tools. Most garages have 15-amp circuits, but a table saw and dust collector running simultaneously can trip breakers. If you’re working with older wiring, consider having an electrician add a dedicated 20-amp circuit for your workshop zone.
Dust management matters from day one. Even without a full collection system, crack a window or door when sanding and cutting. A basic box fan in the window pulling air outward costs under $25 and genuinely helps. You’ll upgrade later, but establishing the habit of clearing airborne dust protects your lungs during every project, starting with your very first cuts.
Step 3: Position Your Primary Workbench
Your workbench anchors everything you’ll do, so get this placement right from day one. Position it beneath a window whenever possible, natural light eliminates shadows that hide cut lines and joinery errors, saving you from costly mistakes as you learn essential beginner woodworking techniques.
Set the bench height so your arms hang comfortably when standing upright, knuckles just brushing the surface. Too low forces hunching; too high fatigues your shoulders. Most people land between 34 and 38 inches, but trust your body over published standards.
Leave at least three feet of clearance on all working sides. You’ll need room to maneuver long boards, swing hammers, and position clamps without constantly rearranging everything. Push the bench away from walls, accessibility beats the space savings.
A sturdy bench doesn’t require fancy joinery or expensive lumber. Reclaimed scaffold planks, salvaged workbench tops from closed shops, or even a solid-core door across sawhorses will handle planing, sawing, and assembly if you anchor it properly. Test stability by leaning hard against the corners. Any wobble means adding bracing or weight before you start actual projects.
Step 4: Organize Tool Storage Within Reach
Position your most-used tools, chisels, tape measure, square, pencil, within arm’s reach of your workbench. Mount a simple pegboard using reclaimed plywood or salvaged pallet wood; trace each tool’s outline with a marker so you’ll notice immediately when something’s missing. Store safety glasses and hearing protection at eye level near the workshop entrance where you can’t miss them. Group tools by task: measuring tools together, cutting tools together, fastening tools together. Keep your least-used items on higher shelves or in drawers below the bench. Install a magnetic strip from salvaged metal for frequently-grabbed hand tools. This arrangement saves steps during projects and reinforces the habit of returning each tool to its home, which matters more for efficiency than any expensive storage system ever could.
Step 5: Create Material Storage and Workflow Zones
Organize your lumber along one wall using simple vertical racks, two 2x4s with angled braces hold boards upright and visible, preventing warping better than flat stacks. Dedicate a corner or overhead space for horizontal storage of sheet goods and longer planks. Position a clearly labeled offcut bin near your saw station; those scraps become tomorrow’s jigs and test pieces rather than waste.
Create distinct zones that mirror your workflow: rough cutting and initial milling near the entrance where sawdust won’t contaminate finishing work, then progression toward your workbench for joinery and assembly, finally a separate finishing area with ventilation and minimal dust. Even in tight spaces, this progression keeps you moving forward through projects rather than backtracking. Tape floor lines or use different colored bins to reinforce these zones until the pattern becomes automatic. Keep pathways between zones clear, you’ll be carrying boards and moving around tools constantly.
Step 6: Establish Safety Stations
Your workshop’s safety infrastructure requires the same care you’d give to organizing your tools. Position a 10-pound ABC fire extinguisher within 10 feet of your workbench, mount it at eye level near the door so you never have to search through smoke to find it. Stock your first aid kit with burn gel, eye wash, bandages, and tweezers for splinters, and keep it in a bright container that stands out on your tool wall. Print emergency numbers in large type and laminate them beside your phone charging station. If you use finishes or solvents, install an eye-wash bottle on a dedicated shelf at face height. Walk through your space and ensure you can reach the exit from any work area without climbing over lumber or dodging equipment, a clear escape route matters more than maximizing storage.
Testing Your Setup: First Project Verification
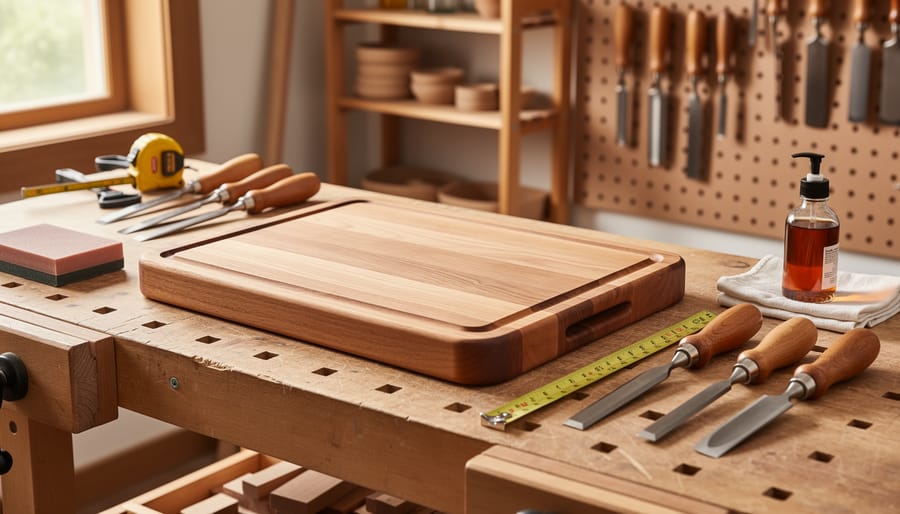
Your workshop setup isn’t complete until you’ve tested it under real working conditions. The best way to verify everything works is completing a simple first project that exercises your entire space. A shop stool or small workbench accessory makes an ideal test run because it requires measuring, cutting, assembly, and finishing without overwhelming you with complexity.
As you work through your first weekend build pay attention to how your body moves through the space. Do you need to walk more than a few steps between your workbench and primary tools? That’s a sign your layout needs adjustment. Notice whether you’re squinting at layout lines or struggling to see blade alignments, which reveals lighting gaps before you start a project that matters. Track how often you reach for safety glasses or hearing protection. If they’re not within arm’s reach of every work station, relocate them now.
The project itself should test multiple stations. Cutting lumber exercises your saw area and checks dust management. Assembly confirms your workbench height feels comfortable after 20 minutes of actual work, not just standing there imagining it. Sanding reveals whether your dust collection keeps up or leaves you breathing particles. Finishing a simple piece from salvaged materials proves you’ve designated appropriate ventilation space.
What you learn during this shakedown run is more valuable than the finished piece. Most beginners discover they need better task lighting, more accessible clamp storage, or a different trash bin placement. Make notes as you work, then spend an hour improving your setup based on what actually slowed you down. This positions you to practice essential beginner techniques efficiently rather than fighting your space every session.
Next Steps: Building Your Skills and Your Workshop
With your workshop set up and your first verification project complete, you’re ready to shift focus from preparation to practice. The foundation you’ve built matters only if you use it consistently, and that means developing core skills methodically rather than jumping randomly between projects.
Start by mastering three fundamental techniques that underpin nearly every woodworking project. First, accurate measuring and marking: practice reading a tape measure to sixteenths, transferring measurements without accumulating errors, and using a combination square to mark clean, square lines. Second, making square cuts: spend time with your circular saw or miter saw until you can cut consistently perpendicular to the board’s edge, checking each cut with your square. Third, basic joinery: begin with simple butt joints secured with screws, then progress to pocket holes, and eventually try your first dado or rabbet joint. These three skills, measuring precisely, cutting squarely, and joining securely, form the bedrock of competent woodworking.
As you complete projects, let your interests guide your tool expansion rather than buying everything at once. If you gravitate toward furniture building, a quality table saw becomes your next priority. If you enjoy detailed work and smaller projects, invest in a router and router table. Carving and shaping enthusiasts should consider a band saw. This organic growth keeps your workshop sustainable and prevents the tool-collecting trap that leaves expensive equipment gathering dust.
How much should I spend on a beginner woodworking setup?
A functional starter workshop costs between $300 and $800, depending on whether you buy new or used tools. Prioritize safety equipment and a sturdy workbench first, then add tools as projects demand them rather than buying everything upfront.
Can I start woodworking in an apartment?
Yes, with modifications. Focus on hand tools, use a portable workbench, and choose smaller projects that don’t generate excessive noise or dust. Many apartment woodworkers build cutting boards, boxes, and small furniture successfully.
What project should I make first?
Build something immediately useful in your workshop, like a simple tool tote or a shop stool from reclaimed materials. These projects teach fundamental skills while creating functional items that improve your workspace.
Where can I find reclaimed lumber for practice?
Check salvage yards, Habitat for Humanity ReStores, Craigslist free sections, and construction site dumpsters (with permission). Pallet wood works well for shop projects, though avoid chemically treated pallets marked with MB (methyl bromide).
Pro Makers offers project plans specifically designed for beginners working with sustainable and salvaged materials, each one building on skills from the previous. Start small, finish what you begin, and let each completed project inform what you build next. Your workshop setup is complete, now make sawdust.