
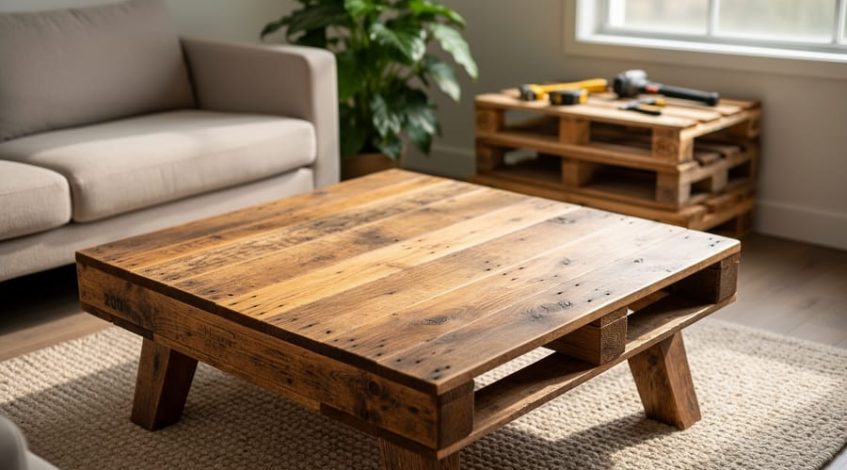
Transform discarded shipping pallets into a stunning centerpiece for your living room while saving hundreds of dollars and keeping usable wood out of landfills. Start by sourcing heat-treated pallets stamped with “HT” rather than chemically treated ones marked “MB” to ensure safety for indoor furniture. Disassemble your pallets using a reciprocating saw or pry bar, working methodically to preserve the longest boards possible for your tabletop surface. Sand every piece thoroughly with 80-grit followed by 120-grit sandpaper to eliminate splinters and create a smooth finish worthy of daily use.
This project represents one of the most rewarding beginner woodworking projects you’ll ever tackle, requiring minimal tools and investment while delivering professional-looking results. The beauty of pallet furniture lies in its imperfections—each knot, nail hole, and grain pattern tells a story of the wood’s previous life transporting goods across the country. You’re not just building a coffee table; you’re participating in the circular economy, proving that sustainable living and beautiful home decor aren’t mutually exclusive.
Whether you envision a rustic farmhouse aesthetic or a sleek modern design, pallets offer surprising versatility. The following comprehensive guide walks you through material selection, construction techniques, finishing options, and customization ideas that transform basic reclaimed lumber into a conversation-starting furniture piece that reflects your personal style and environmental values.
Why Pallet Wood Makes Perfect Coffee Tables
Pallet wood brings something special to furniture making that you simply can’t buy at a lumber yard—character, history, and proven strength all wrapped into one surprisingly accessible material. These humble shipping platforms transform into stunning coffee tables that tell a story while serving your daily needs.
The rustic aesthetic of pallet wood creates instant visual warmth. Each board carries its own personality through weathered grain patterns, natural color variations, and the occasional stamp marking from its previous life in logistics. These imperfections aren’t flaws—they’re features that give your finished piece authenticity and charm. Unlike pristine lumber that can feel sterile, pallet wood delivers an organic, lived-in quality that complements both modern and traditional spaces.
But beauty isn’t the only benefit. Pallets are engineered to support loads exceeding 2,000 pounds, meaning the wood you’re working with was literally built for durability. This structural integrity transfers perfectly to reclaimed wood furniture applications. The dense hardwoods commonly used in pallet construction—oak, maple, and hickory among them—withstand daily wear beautifully, making them ideal for high-traffic pieces like coffee tables.
The sustainability factor adds another compelling dimension to your project. By diverting pallets from landfills, you’re participating in genuine environmental stewardship while creating something meaningful for your home. Each table becomes a conversation starter about resourcefulness and conscious consumption.
The variety available also works in your favor. Different pallets showcase different wood species, grain patterns, and aging characteristics, ensuring your creation will be truly one-of-a-kind. This natural diversity eliminates the cookie-cutter appearance of mass-produced furniture, giving you a custom piece that reflects your commitment to both craftsmanship and environmental responsibility.
Finding and Selecting the Right Pallets
Understanding Pallet Stamps and Safety Codes
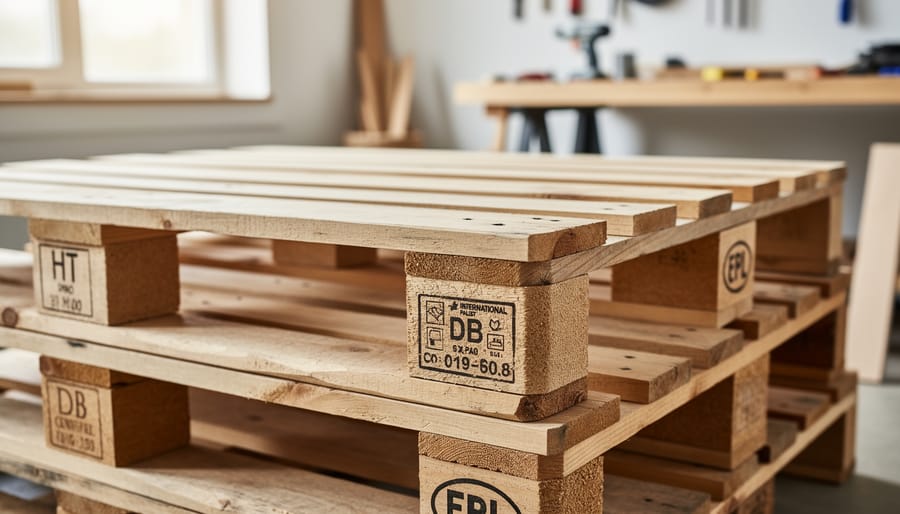
Before you start transforming that weathered pallet into your dream coffee table, take a moment to become a pallet detective! Every safe pallet carries an IPPC (International Plant Protection Convention) stamp—your roadmap to understanding what that wood has been through. This matters tremendously when you’re bringing reclaimed materials into your home.
Look for the “HT” marking, which stands for Heat Treated. This is your green light! HT pallets have been kiln-dried at high temperatures to eliminate pests and pathogens, making them perfectly safe for indoor furniture projects. They’re your sustainable champion—ready for a second life without any chemical concerns.
Steer clear of pallets stamped with “MB” (Methyl Bromide), a toxic fumigant that’s been phased out in many countries but still appears on older pallets. These aren’t suitable for indoor use, period. You might also see country codes (like “US” for United States) and registration numbers—useful for tracing origin but less critical for safety.
Can’t find a stamp? When in doubt, leave it out. Unmarked pallets are mystery boxes that might have carried chemicals, food waste, or been treated with unknown substances. Your health and your family’s wellbeing are worth sourcing stamped, HT-marked pallets. Remember, choosing the right pallet is choosing safety without compromising your commitment to sustainability.
Best Places to Source Free Pallets
Finding free pallets for your coffee table project is easier than you might think, and it’s one of the most rewarding aspects of sustainable woodworking. Start by visiting local retail stores, particularly garden centers, furniture shops, and appliance retailers—they often have stacks of pallets they’re happy to give away. Construction sites can be goldmines, though always ask the site supervisor for permission first and inquire about the pallet’s original cargo to ensure it’s safe for indoor furniture.
Small manufacturing facilities and warehouses frequently discard pallets that are perfect for DIY projects. Check behind shopping plazas early in the morning when businesses put out pallets for disposal. Don’t overlook distribution centers for beverage companies or food suppliers, as they typically have clean, heat-treated pallets ideal for furniture.
When approaching businesses, be polite and professional. Explain you’re working on a sustainable furniture project and ask if they have any pallets destined for disposal. Many managers appreciate that you’re keeping materials out of landfills. Always inspect pallets for the HT (heat-treated) stamp rather than MB (methyl bromide), which indicates chemical treatment. Look for sturdy construction without excessive stains, strong odors, or damage. Building relationships with local businesses can create ongoing sources for your woodworking adventures, turning someone’s waste into your creative treasure.
Essential Tools and Materials You’ll Need
Transforming reclaimed pallets into a stunning coffee table doesn’t require a professional workshop, making this project perfect for beginners and experienced makers alike. The beauty of pallet furniture lies in its accessibility—you can achieve beautiful results with just a handful of essential woodworking tools and some creative problem-solving.
| Tool/Material | Purpose | Budget-Friendly Alternative |
|---|---|---|
| Circular saw or miter saw | Cutting pallet boards to size | Hand saw (requires more effort but costs under $15) |
| Orbital sander | Smoothing surfaces and removing splinters | Sanding block with assorted grits (80, 120, 220) |
| Drill/driver combo | Pre-drilling holes and driving screws | Manual screwdriver with pre-drilled pilot holes |
| Pry bar | Disassembling pallets safely | Hammer and flathead screwdriver combination |
| Wood finish | Protecting and enhancing wood grain | Linseed oil or beeswax (natural, food-safe options) |
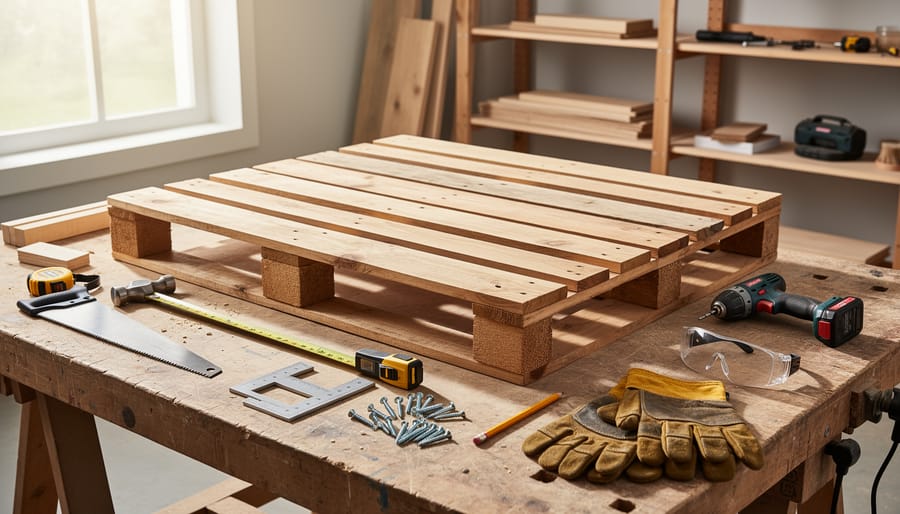
Beyond these core items, you’ll need measuring tape, a carpenter’s square for ensuring straight cuts, and safety equipment including gloves and protective eyewear. Don’t skip the safety gear—reclaimed wood can harbor hidden nails and sharp edges.
For fasteners and finishing, gather 2.5-inch exterior screws, wood glue for reinforcing joints, and multiple grits of sandpaper. Start with 80-grit for initial smoothing, progress to 120-grit for general finishing, and complete with 220-grit for that silky-smooth touch.
Optional advanced tools that accelerate the process include a reciprocating saw for faster pallet disassembly, a planer for achieving uniform board thickness, and a nail gun for quicker assembly. However, these aren’t necessary for success—just helpful time-savers.
Remember, sustainable crafting means working with what you have. Many community workshops and makerspaces offer tool access for small fees, and borrowing from friends builds community connections while reducing consumption. This project celebrates resourcefulness, so embrace creative solutions that match your current tool collection.
Preparing Your Pallet Wood
Safe Deconstruction Techniques
Taking apart pallets without damaging the wood transforms what could be frustrating into an empowering first step of your sustainable furniture journey. The key is working smarter, not harder, and respecting the materials you’re rescuing from waste.
Start by examining how your pallet is assembled. Most feature nails driven from the bottom deck boards into support blocks. A reciprocating saw with a metal-cutting blade becomes your best friend here—simply slide the blade between boards and cut through the nails in seconds. This method preserves nearly all the wood while saving tremendous effort.
If you’re working with hand tools, invest in a quality pry bar and a block of scrap wood to protect your lever points. Begin at the ends of each board where nails are most accessible. Work slowly and methodically, alternating sides to distribute pressure evenly. The satisfying pop of each board coming free reminds you that patience pays off.
For stubborn pallets with ring-shank nails, consider strategic cutting instead. Use a circular saw to cut support blocks flush with deck boards, leaving nail heads exposed for easy removal later. This approach wastes minimal wood while dramatically reducing splitting.
Remember, every preserved board means less material needed and more character retained for your unique coffee table.
Cleaning and Treating Reclaimed Wood
Before your pallet wood transforms into a stunning coffee table, it needs proper cleaning and preparation—this crucial step ensures your finished piece is safe, beautiful, and built to last. Think of it as giving your reclaimed materials a fresh start while preserving their character.
Begin by inspecting each pallet board outdoors. Remove any protruding nails, staples, or metal fasteners using a pry bar and hammer. Next, tackle surface dirt with a stiff bristle brush to dislodge dried mud and debris. For deeper cleaning, scrub boards with a mixture of warm water and mild dish soap, then rinse thoroughly with a garden hose. Allow the wood to dry completely for at least 48 hours in a well-ventilated area—this prevents warping and reveals the wood’s true condition.
Sanding is where transformation truly begins. Start with 80-grit sandpaper to remove rough spots, weathered surfaces, and minor imperfections. Progress to 120-grit for smoothness, then finish with 220-grit for a furniture-quality feel. An orbital sander speeds the process considerably, though hand sanding works perfectly for smaller projects. Always sand in the direction of the grain to avoid scratches.
Watch for signs of pest infestation during cleaning—small holes, sawdust piles, or live insects require treatment. Heat treatment in direct sunlight for several days can eliminate minor concerns, while significant infestations may need professional fumigation or wood replacement.
Remember, this preparation honors both your project and the wood’s second life. Every grain pattern revealed through cleaning tells a story, and your attention to detail ensures years of reliable service from your handcrafted creation.
Design Options and Planning Your Build
The beauty of pallet coffee tables lies in their incredible versatility—you can create everything from a rustic showpiece in an afternoon to an heirloom-quality furniture piece over a weekend. Your design journey starts with understanding your skill level and vision, then selecting an approach that brings both together sustainably.
For beginners, the whole pallet approach offers an inspiring entry point. Simply stack one or two pallets, add casters or legs, and apply your finish of choice. This method celebrates the pallet’s inherent character, showcasing weathered wood and industrial charm while requiring minimal tools. You’ll complete your table in just a few hours, gaining confidence and experiencing the satisfaction of transforming discarded materials into functional art.
Intermediate builders often gravitate toward modified whole pallets, where you might add a glass top, build storage compartments between deck boards, or create a lift-top mechanism for hidden storage. These projects introduce basic joinery and hardware installation while maintaining the recognizable pallet aesthetic that many find appealing.
Advanced crafters can deconstruct pallets completely, reimagining individual boards into sophisticated furniture. This approach unlocks unlimited design possibilities—herringbone patterns, intricate inlays, or seamless plank arrangements that disguise their humble origins. You’re also selecting only the finest boards, ensuring structural integrity and visual consistency.
- Whole pallet designs require minimal cutting and maintain authentic rustic character.
- They’re beginner-friendly with faster completion times and fewer tools needed.
- Maximum material efficiency means less waste during construction.
- Deconstructed rebuilds offer greater design flexibility and customization options.
- Whole pallets may contain damaged boards you cannot easily replace.
- Rebuilt tables can achieve more refined, furniture-grade appearances.
When planning dimensions, standard pallets measure 48 by 40 inches—generous for most living spaces but consider your room’s scale. Coffee table height typically ranges from 16 to 18 inches; stacking two pallets often creates the perfect elevation. Think about your lifestyle needs: do you need lower shelves for magazines, hidden storage for remotes, or a solid surface for entertaining? Each design choice reflects both your practical requirements and your commitment to giving discarded materials new purpose.
Step-by-Step Build Instructions
Building the Base Frame
Creating a solid foundation is where your pallet coffee table truly begins to take shape, and this is honestly one of the most rewarding stages of the build. Start by selecting your straightest pallet boards for the base frame—you’ll need four pieces cut to form a rectangle that matches your desired table dimensions. Most builders find success with a frame measuring roughly 36 inches by 20 inches, though your vision might call for something different.
For joining these boards, pocket hole screws offer the strongest connection and work beautifully with reclaimed wood. If you don’t have a pocket hole jig, simple butt joints reinforced with wood glue and 2.5-inch exterior-grade screws will serve you well. The key is pre-drilling pilot holes to prevent the wood from splitting—pallet wood can be temperamental, and we want to honor these reclaimed materials by working carefully with them.
Corner reinforcement transforms a good frame into a great one. Cut triangular braces from scrap pallet wood and secure them at each corner with screws. These small additions distribute weight evenly and prevent racking over time, ensuring your table withstands years of coffee cups and conversation.
Before moving forward, check that your frame sits perfectly level. Place a carpenter’s level across both diagonal measurements. If you notice wobbling, adjust by sanding down high spots or adding thin shims. This attention to detail now means you won’t be frustrated with an uneven table later. Remember, every sustainable project deserves this kind of thoughtful craftsmanship.
Attaching the Tabletop Boards
Now comes the exciting moment when your reclaimed pallet transforms into a beautiful coffee table surface! Start by arranging your prepared boards on the frame before securing anything. This is your chance to create visual interest by playing with different board widths, grain patterns, and natural color variations. Think of it as composing a wooden work of art—mix darker and lighter boards, or alternate wide and narrow pieces for a dynamic look that celebrates the character of reclaimed wood.
For spacing, you have options depending on your style preference. Butting boards tightly together creates a solid, traditional surface perfect for everyday use. Alternatively, leaving small gaps of 1/8 to 1/4 inch between boards adds rustic charm and allows for natural wood expansion. These gaps also reduce the chance of cupping or warping over time, which is especially helpful since pallet wood may have varying moisture content.
Once you’re happy with the arrangement, secure each board using wood screws driven from underneath the frame. This hidden fastening method keeps the top surface clean and beautiful. Pre-drilling pilot holes prevents splitting and makes driving screws much easier. Use two screws per board at each cross support for stability.
Dealing with uneven boards? Don’t let this discourage you—it’s completely normal with reclaimed materials! A belt sander or hand planer can level minor differences, transforming imperfections into smooth transitions. Remember, slight variations add character and tell the story of your sustainable creation. These quirks make your piece uniquely yours, impossible to replicate in any store-bought furniture.
Adding Legs or Casters
Choosing the right base transforms your pallet coffee table from simple to stunning! Hairpin legs bring mid-century modern charm and elevate your piece both literally and stylistically—simply attach them using pre-drilled mounting plates with sturdy wood screws driven into the pallet’s strongest sections. For rustic appeal, consider chunky wooden legs cut from 4×4 lumber; these beauties ground your table while maintaining that reclaimed aesthetic. Secure them with corner braces or pocket hole screws for maximum stability.
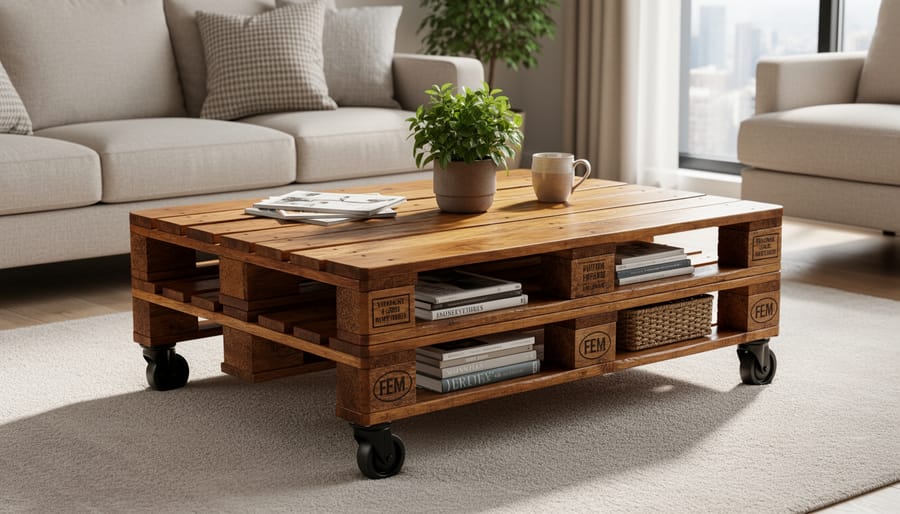
Industrial casters offer the ultimate flexibility, letting you roll your creation wherever needed—perfect for small spaces! Choose locking casters rated for at least 100 pounds each to support your table’s weight safely. Before attaching any legs or casters, flip your tabletop over and mark precise placement points, ensuring equal spacing from edges to prevent tipping. Pre-drill all holes to avoid splitting the pallet wood, especially near edges.
Here’s an inspiring tip: mixing materials creates visual interest! Try pairing sleek metal hairpin legs with weathered pallet wood for stunning contrast. Whatever option you choose, test stability by applying gentle pressure from different angles before declaring victory. Your sustainable masterpiece deserves a foundation as solid as your commitment to upcycling!
Sanding and Finishing Your Coffee Table
Progressive Sanding for Smooth Results
Transforming rough pallet wood into a silky-smooth surface is where your coffee table truly comes alive. Start with 60 or 80-grit sandpaper to knock down the roughest spots, splinters, and weathered surface layers. This aggressive first pass removes the character you don’t want while preserving those beautiful grain patterns that make reclaimed wood special.
Progress methodically through 120-grit, then finish with 180 or 220-grit for a furniture-quality surface. Each grit level erases the scratches from the previous one, so don’t skip steps or you’ll end up with visible sanding marks.
For large, flat surfaces, an orbital sander dramatically speeds up the work and delivers consistent results. However, keep a sanding block handy for edges, corners, and detailed areas where machines can’t reach. Hand sanding also gives you better control around knots and imperfections that add rustic charm.
Pay special attention to end grain and areas where boards meet, as these spots often harbor sneaky splinters. Run your hand across every surface, moving in different directions to catch rough patches your eyes might miss. This tactile inspection ensures your sustainable creation is safe and inviting to touch, ready for countless conversations and coffee cups ahead.
Choosing and Applying the Right Finish
The finish you choose transforms your pallet coffee table from rustic reclaimed wood into a showpiece that tells your unique sustainability story. Let’s explore options that protect your creation while honoring its repurposed origins.
For a natural, eco-friendly approach, consider Danish oil or tung oil. These penetrating finishes enhance the wood’s grain beautifully while providing moderate protection. Apply with a lint-free cloth in thin coats, allowing 6-8 hours between applications. Two to three coats typically suffice, and the low-sheen result celebrates the wood’s authentic character. This finish requires occasional reapplication annually but remains wonderfully forgiving for beginners.
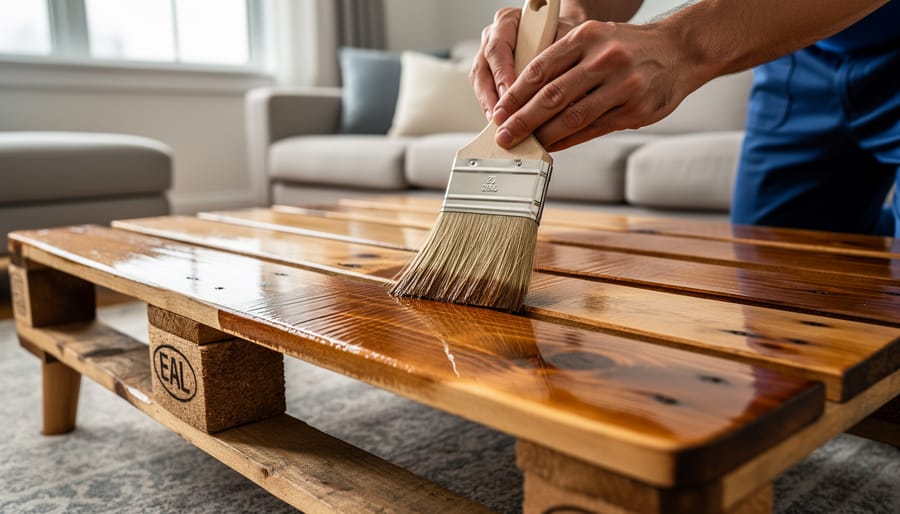
Polyurethane offers superior durability for high-traffic homes. Water-based versions dry within 2-4 hours and emit fewer fumes, aligning with environmental consciousness. Oil-based polyurethane takes 24 hours between coats but delivers that warm amber glow many woodworkers adore. Apply with smooth, even brush strokes or foam applicators, lightly sanding between coats with 220-grit sandpaper.
Wax finishes provide vintage appeal and easy touch-ups. Buff paste wax onto sealed wood for a soft luster that invites touch. While requiring more frequent maintenance every few months, wax repairs scratches effortlessly and connects you regularly with your handcrafted piece.
For comprehensive guidance on all these methods, explore our wood finishing techniques resource. Whichever finish you select, allow proper curing time—typically 72 hours minimum—before regular use. Your patience ensures your sustainable creation withstands daily life while maintaining its reclaimed beauty for years ahead.
Customization Ideas and Creative Touches
Now comes the exciting part—transforming your pallet coffee table from functional to phenomenal! This is where your creativity takes center stage and your sustainable creation becomes a true reflection of your personal style.
Consider adding hidden storage compartments between the slats or beneath a hinged top section. This practical touch keeps remotes, magazines, and coasters tucked away while maximizing your living space. One maker we know transformed the hollow center of their double-stacked pallet design into a secret storage area perfect for board games—talk about conversation starter!
Glass tops offer an elegant upgrade that protects the wood while showcasing the rustic beauty beneath. You can source tempered glass from local suppliers or even repurpose an old table top, keeping your eco-friendly commitment strong. The smooth surface makes cleaning effortless while maintaining that industrial-chic aesthetic.
Stenciled designs breathe personality into your piece. Try geometric patterns, botanical motifs, or even city maps that hold special meaning. Use non-toxic, water-based paints to stay environmentally responsible. Heat transfers and wood burning tools create stunning permanent designs that won’t chip or fade.
Metal accents and industrial hardware add edgy contrast to weathered wood. Consider corner brackets, pipe fittings, or vintage drawer pulls salvaged from architectural salvage yards. These reclaimed metal pieces tell their own stories while complementing your upcycled vision.
Experiment with unconventional leg styles too. Hairpin legs provide mid-century modern flair, while chunky timber blocks create Scandinavian simplicity. Casters transform your table into a mobile workspace. Some crafters even use stacked concrete blocks for an ultra-industrial statement.
Remember, there’s no wrong approach here. Your coffee table should spark joy and serve your lifestyle. Whether you prefer minimalist elegance or maximalist creativity, this reclaimed pallet provides the perfect blank canvas for your imagination.
Troubleshooting Common Challenges
Every DIY project comes with its own set of learning moments, and building a pallet coffee table is no exception. The good news? Most challenges have straightforward solutions that will strengthen your woodworking skills and confidence.
Warped or twisted boards are perhaps the most common frustration. Rather than fighting against severely curved pieces, save yourself the headache and set them aside for smaller projects like shelving or garden markers. For moderately warped boards, you can often flatten them by screwing them down gradually, working from the center outward and applying pressure as you go. If boards are slightly cupped, install them with the curve facing down so weight naturally flattens them over time.
Stubborn nails and staples can test your patience, but the right approach makes removal much easier. Soak rusted fasteners with penetrating oil for 15-20 minutes before attempting extraction. Use a cat’s paw or flat pry bar for nails, working at an angle to gain leverage. For staples, slip a flathead screwdriver underneath and twist while pulling upward. Remember, this is sustainable crafting at its finest—you’re giving these materials a second life, and a little extra effort honors that environmental commitment.
Construction stability issues usually stem from inadequate connections or uneven legs. If your table wobbles, check that all corners meet at perfect right angles using a framing square. Add corner braces underneath for additional rigidity, and ensure your leg attachments use at least three screws per connection point. Diagonal cross-bracing between legs works wonders for stability.
What if my boards are different thicknesses?
Use a belt sander or hand planer to level the surface, or embrace the variation by arranging boards in a pattern that creates intentional texture and visual interest.
How do I fix a wobbly table?
Check for uneven leg lengths first, trimming the longer ones to match. Add cross-bracing between legs or install adjustable furniture levelers on each corner for perfect stability on uneven floors.
My finish looks blotchy—what went wrong?
Pallet wood often has varying densities that absorb stain unevenly. Apply a pre-stain wood conditioner next time, or sand more thoroughly to open the wood grain consistently across all boards.
Finish problems often result from inadequate surface preparation. If your stain looks uneven, lightly sand with 220-grit paper and apply another coat, working in the direction of the grain. For rough patches in polyurethane, let it cure completely, then sand smooth with fine-grit paper and add another thin coat. Remember that pallet wood has character—some imperfections tell the story of its journey and add authentic charm to your sustainable creation.
The Environmental Impact of Your Creation
By transforming a discarded pallet into your beautiful coffee table, you’ve accomplished something truly remarkable for our planet. Each wooden pallet you rescue diverts approximately 40-50 pounds of material from landfills, where it would otherwise decompose and release methane, a greenhouse gas 25 times more potent than carbon dioxide. Your single project has made a measurable difference.
Consider the environmental cost of purchasing a new coffee table from a furniture store. Manufacturing new furniture requires harvesting virgin timber, energy-intensive processing, chemical treatments, packaging materials, and long-distance transportation—often from overseas factories. Studies show that producing new wood furniture generates roughly 100-150 pounds of carbon emissions per piece. By choosing reclaimed pallets, you’ve effectively eliminated nearly all of these emissions while giving existing materials a beautiful second life.
The ripple effect of your choice extends beyond one table. When friends and family admire your creation and learn about its origins, you inspire others to consider similar upcycling projects. This multiplier effect creates community-wide environmental benefits as more people embrace sustainable DIY practices.
You’ve also reduced demand for new lumber, which helps preserve forests that serve as carbon sinks, wildlife habitats, and biodiversity sanctuaries. Every reclaimed board matters in the larger environmental picture. Your coffee table stands as a daily reminder that sustainable choices don’t require sacrifice—they create beauty, save money, and protect the planet simultaneously. You’re not just a woodworker; you’re an environmental steward making thoughtful choices that future generations will appreciate.
Congratulations! You’ve just transformed discarded pallets into a beautiful, functional centerpiece for your home. Take a moment to appreciate what you’ve accomplished—you didn’t just build a coffee table, you’ve developed valuable woodworking skills, reduced waste, and created something truly unique with your own hands. The satisfaction of seeing those weathered boards transform into furniture you’ll use every day is something no store-bought piece can replicate.
Throughout this project, you’ve learned essential techniques like proper wood selection, safe dismantling methods, sanding, finishing, and assembly. These skills are transferable to countless other reclaimed wood projects waiting in your future. Perhaps that stack of pallets you spotted yesterday is already calling out to become outdoor seating, wall art, or shelving units. The possibilities are endless once you recognize the potential in materials others overlook.
Your coffee table represents more than craftsmanship—it’s a statement about sustainability and conscious living. By choosing reclaimed materials, you’ve kept usable wood from landfills and reduced demand for new lumber. That’s something worth celebrating and sharing.
We’d love to hear your creation story! What challenges did you overcome? What unique features make your table special? Share your experience with fellow DIY enthusiasts and inspire others to discover the joy of building furniture from reclaimed materials.