
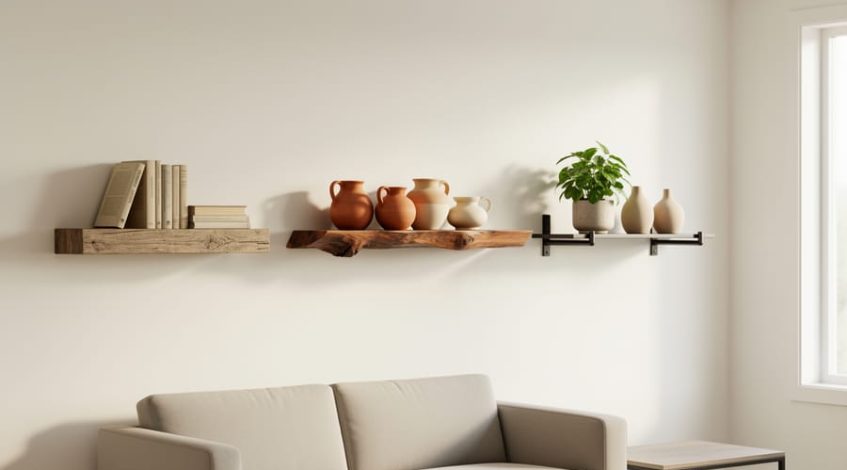
Floating shelves transform living room walls into dynamic focal points that blend storage, display, and architectural character without the visual bulk of traditional furniture. Whether you’re working with reclaimed oak planks and a starter woodworking kit or installing minimalist metal-backed shelves, the right arrangement elevates everything from book collections to heirloom ceramics while keeping floor space open and sight lines clean.
The appeal runs deeper than aesthetics. Floating shelves offer unmatched flexibility, you can adjust height and spacing to suit your exact needs, stack them asymmetrically for visual drama, or use sustainable materials that tell a story. A single live-edge walnut shelf might showcase handmade pottery, while a staggered grid of maple boards creates a modern media wall that hides clutter and frames a flat screen.
Success hinges on matching shelf style to your room’s architecture and your own skill level. Simple installations suit anyone comfortable with a beginner workshop setup while more ambitious configurations like corner wraps or backlit niches reward intermediate builders. The twelve ideas ahead span industrial pipe brackets to invisible hardware, reclaimed barn wood to sleek lacquered surfaces, each designed to inspire your next project and maximize both function and visual impact.
How We Selected These Living Room Floating Shelf Ideas
We curated these twelve floating shelf ideas using criteria that matter to woodworkers who value both craftsmanship and results. Each concept earned its place by meeting multiple practical and aesthetic standards.
Our selection criteria included:
- Design versatility to complement modern, industrial, minimalist, and organic living room styles
- DIY-friendliness with clear construction approaches accessible to home woodworkers
- Opportunities to incorporate sustainable, reclaimed, or repurposed materials
- Strong visual impact that transforms walls into functional focal points
- Practical storage and display functionality beyond pure decoration
- Range of complexity from beginner projects to advanced woodworking showcases
These ideas span the skill spectrum intentionally. If you’re just gathering essential tools and learning basic techniques, you’ll find straightforward picture ledges and simple staggered arrangements. Experienced makers can tackle steam-bent curves or complex geometric installations that demonstrate mastery.
We prioritized designs that work in real living spaces, not just showrooms. Each concept addresses actual needs: awkward corners, underused vertical space, media integration challenges, or the desire for changeable displays. The emphasis on reclaimed and sustainable materials reflects our commitment to responsible woodworking without compromising the character or durability your projects deserve. Whether you choose one idea or combine several, these selections give you concrete starting points that deliver both beauty and function.
1. Staggered Height Corner Shelves for Underutilized Spaces
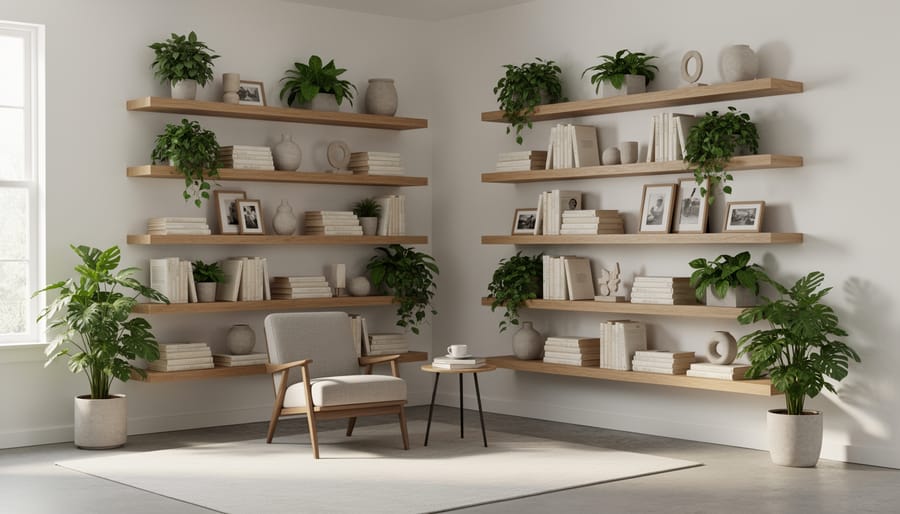
Corners often become forgotten zones in living rooms, but staggered height floating shelves transform these awkward angles into purposeful vertical displays. This arrangement layers shelves at deliberately varied heights, perhaps one at hip level, another at eye height, and a third stretching toward the ceiling, creating visual movement that pulls the gaze upward and makes ceilings feel taller.
The beauty of this design lies in its dimensionality. Rather than mounting shelves in predictable parallel lines, offsetting them by 10 to 18 inches vertically creates natural staging areas. A trailing pothos plant cascades from the highest shelf while hardcover books anchor the middle level, with ceramic pieces or photo frames claiming the lower position. The eye travels between heights, discovering new details rather than scanning a flat plane.
Reclaimed wood works particularly well here because each shelf becomes its own character piece. A weathered barn board at the top might show rich patina and saw marks, while a rescued pallet plank below carries different grain patterns. These variations feel intentional in a corner installation where shelves occupy separate visual zones. Thickness can vary too, mixing a chunky 2-inch slab with slimmer 1-inch boards adds textural interest without looking mismatched.
Start with the middle shelf first, positioning it where you’ll interact most frequently. Build upward and downward from there, keeping 14 to 20 inches between each level for practical access. The asymmetry feels organic rather than chaotic, especially when you group objects by height and weight across the three tiers.
2. Floor-to-Ceiling Asymmetric Shelf Wall
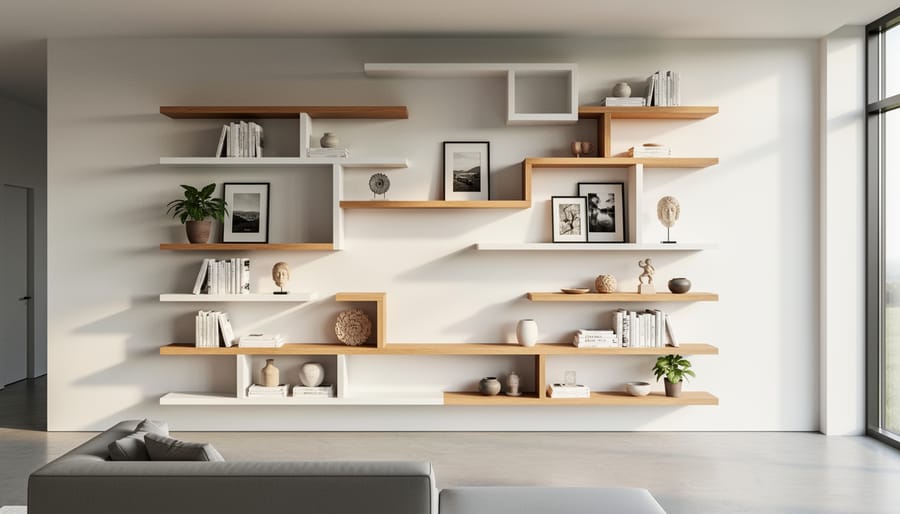
An asymmetric shelf wall running from floor to ceiling transforms a blank living room wall into architectural drama. Unlike uniform spacing, this approach staggers shelves at different heights and lengths, creating dynamic visual movement that guides the eye through intentional negative space.
Planning starts on paper or with painter’s tape on the wall. Map out shelf positions before drilling a single hole, considering the items you’ll display and their weights. Group shorter shelves near taller ones to establish rhythm without symmetry. Leave larger gaps in some areas and cluster shelves in others, this intentional imbalance prevents the installation from feeling chaotic.
Anchoring becomes critical when shelves span eight feet or more vertically. Locate wall studs with a stud finder and plan shelf placement to hit at least two studs per bracket. For plaster walls or gaps between studs, use toggle bolts rated for the combined weight of shelf and contents plus a 50% safety margin. Top and bottom shelves carry the most visual weight, so these require the strongest anchoring points.
Sustainable hardwoods like oak or maple offer both strength and beauty for this statement piece, though quality plywood with exposed edges can deliver stunning results at lower cost and environmental impact. Mix shelf lengths, perhaps one 48-inch piece, two 30-inch sections, and three 18-inch shelves, to emphasize the asymmetric design.
This arrangement excels at displaying book collections, pottery, plants at varying heights, and family photos while maintaining breathing room that prevents the wall from overwhelming your space.
3. Live-Edge Floating Shelves for Organic Warmth
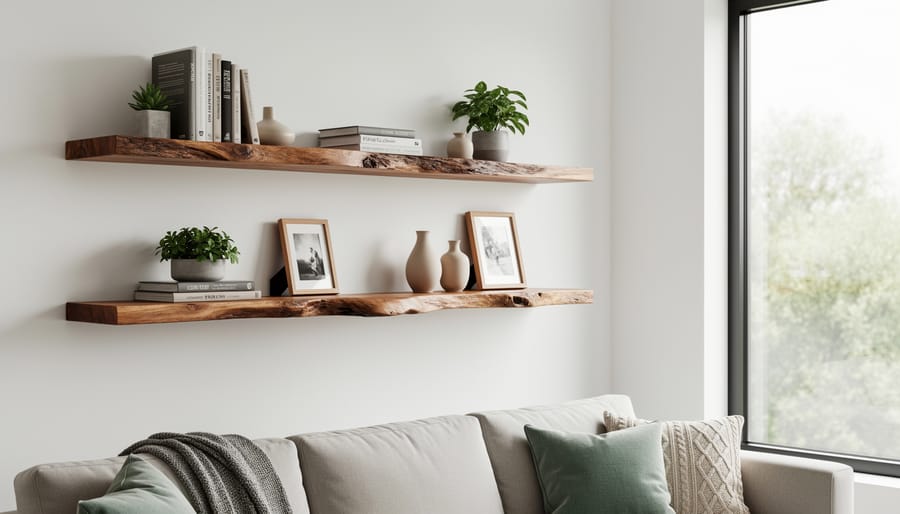
Live-edge wood slabs transform ordinary floating shelves into conversation pieces that tell a story. Each board carries the natural contours of the tree, complete with bark edges, growth rings, and unique grain patterns that bring unmatched organic warmth to your living room.
Sourcing these one-of-a-kind pieces requires some detective work, but the hunt is part of the adventure. Local sawmills often sell live-edge slabs at a fraction of specialty retailer prices, and many keep sustainable forestry practices. Estate sales, reclamation yards, and tree removal services can yield incredible finds, fallen trees that would otherwise become mulch. Look for hardwoods like walnut, oak, or cherry that air-dried for at least a year to minimize warping after installation.
Preparing live-edge shelves demands respect for the material’s character. Start by removing loose bark with a wire brush or chisel, then sand progressively from 80 to 220 grit. The irregular edges need gentle handling to preserve their natural shape while creating smooth, safe surfaces. Apply a penetrating oil finish or clear epoxy to highlight the grain and provide moisture protection, especially important if you’re mounting near heat sources where fireplace hearth codes might inform safe clearances.
These shelves work beautifully as standalone focal points above sofas or as part of asymmetric gallery walls. Their irregular widths, often varying by several inches along a single board, create visual interest that mass-produced shelving simply cannot match. Pair them with simple steel bracket systems that disappear beneath the slab, letting the wood’s natural beauty take center stage.
4. Behind-the-Sofa Console Shelf
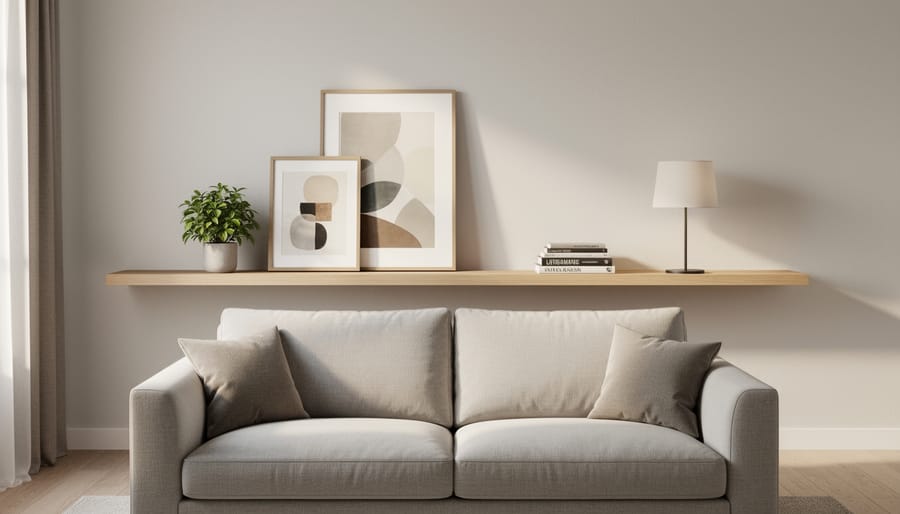
A long floating shelf positioned behind your sofa transforms an often-wasted strip of wall into prime functional real estate. This arrangement works brilliantly in open-concept living spaces where the sofa floats away from the wall, creating a natural landing spot for table lamps, picture frames, and everyday essentials without requiring a bulky console table footprint.
The sweet spot for depth runs 6 to 8 inches, wide enough to hold a lamp base and decorative objects securely, yet slim enough that you won’t bump your head when settling into the cushions. Mount the shelf at arm height, typically 30 to 36 inches from the floor, so you can reach a reading lamp or set down a drink without stretching. This height also keeps the shelf visible from both sides of the sofa, creating visual interest whether you’re approaching from the seating area or the space behind.
For construction, a single long plank makes a clean statement, though you can use free pallets broken down into planks if you’re working sustainably on a budget. The length should span most of the sofa width, if your couch measures 84 inches, aim for a 72- to 78-inch shelf to maintain visual balance without extending awkwardly past the furniture edges.
Style the surface with a pair of matching lamps anchoring each end, then fill the center span with framed family photos, small succulents, or a stack of art books, keeping the arrangement intentionally loose so it feels curated rather than cluttered.
5. Reclaimed Scaffold Board Shelving
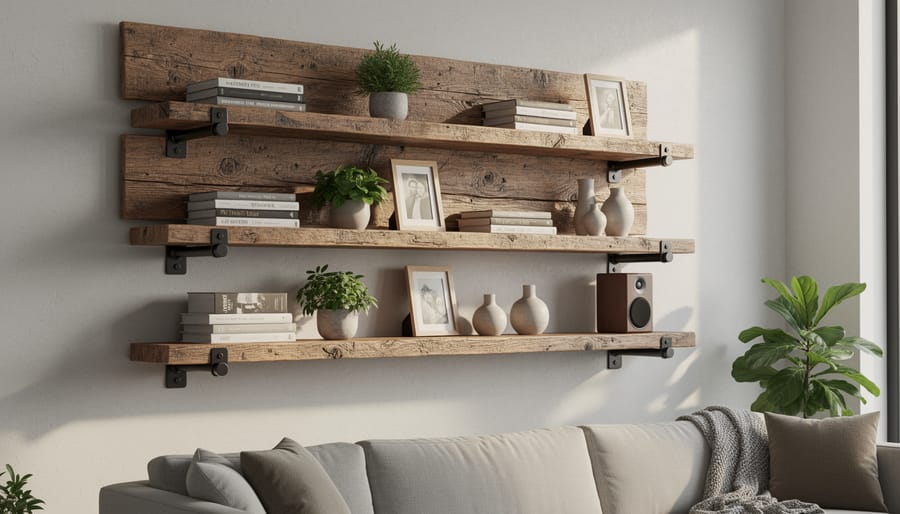
Scaffold boards carry decades of stories in their weathered grain, nail holes, and paint splatters. Originally used to support construction workers at height, these thick planks, typically 38mm (1.5 inches) solid timber, transform into exceptionally robust floating shelves that can handle serious weight while adding unmistakable industrial character to your living room.
The sustainability angle here is compelling. Every reclaimed scaffold board diverted from landfill represents timber already harvested and seasoned through years of outdoor use. You’re giving construction waste a second life as functional furniture, often at a fraction of the cost of new hardwood. Architectural salvage yards and online marketplaces regularly stock these boards, with prices varying based on condition and markings.
Preparation starts with thorough cleaning using a stiff brush and mild detergent to remove construction grime and concrete residue. Inspect for protruding nails or screws, removing or hammering them flush. Sand the surface progressively from 80 to 180 grit, deciding whether to preserve the weathered patina or create a smoother finish. You’re balancing character with practicality, some wear tells the story, but deep gouges might need filling.
For finishing, hard wax oil enhances the grain while protecting the wood without hiding its history. Clear polyurethane provides more durable protection if you’re placing drinks or electronics on these shelves. The thickness means you can confidently mount them to studs with heavy-duty floating shelf brackets, supporting books, record collections, or substantial decorative objects without deflection.
The result pairs perfectly with exposed brick, concrete walls, or as deliberate contrast in minimalist white spaces where the rugged texture becomes the focal point.
6. Minimalist Box Shelves with Hidden Storage
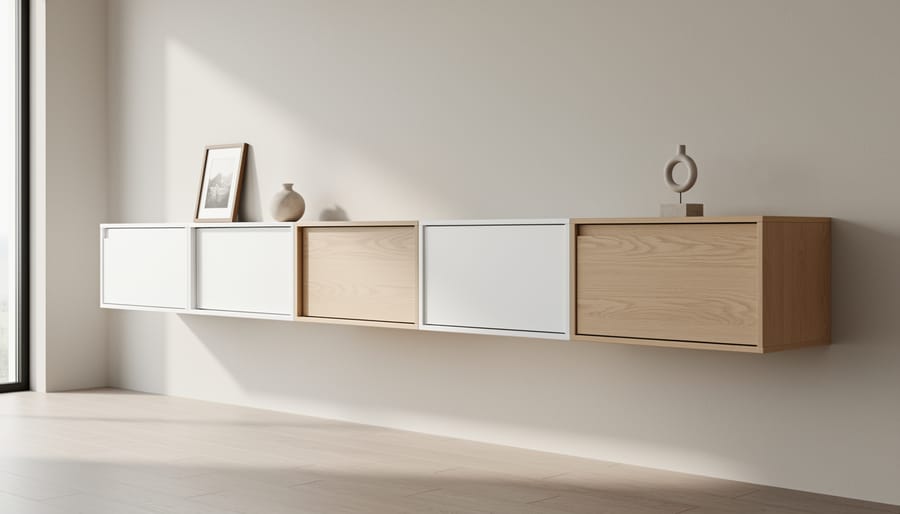
Box-style floating shelves solve a common living room challenge: providing display space while concealing clutter. Unlike open shelves, these enclosed units feature backs and sides that create hidden compartments, perfect for stashing remote controls, charging cables, or personal items you’d rather keep out of sight.
Construction starts with creating rectangular boxes from plywood or solid hardwood. Cut five pieces, top, bottom, back, and two sides, then join them with pocket screws or dowels for a clean exterior. The key difference from standard shelving is leaving the front partially or fully open, creating a shadow box effect that maintains the floating illusion while hiding the compartment’s depth.
For truly seamless aesthetics, finish all interior surfaces before assembly. White or matching wall colors make the interior disappear visually, while contrasting tones create deliberate depth. Edge-banding plywood edges before finishing eliminates telltale lamination lines.
Mount these boxes using heavy-duty French cleats or robust floating shelf brackets rated for the increased weight of enclosed construction. Because the back panel distributes load across more wall anchors than open shelves, box shelves handle substantial weight, ideal for storing books or electronics inside while displaying lighter décor on top.
The dual functionality shines in compact living rooms. Top surfaces showcase plants, candles, or framed photos while concealed compartments swallow everyday chaos. Vary box depths across your wall to create dimensional interest: shallow 6-inch boxes for display, deeper 12-inch units for serious storage. This graduated approach maintains visual lightness while maximizing hidden capacity.
7. Picture Ledge Gallery Wall System
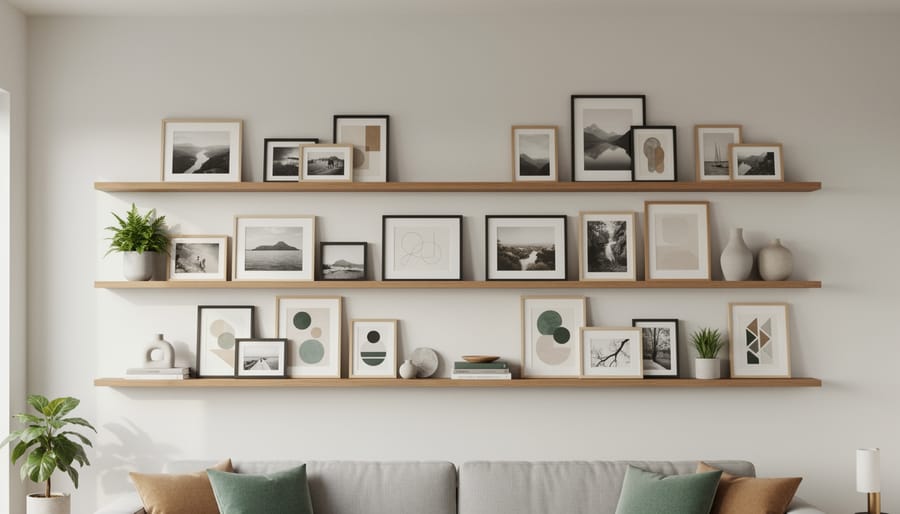
Picture ledges transform your living room into a rotating art gallery without the commitment of hammer and nails. These shallow shelves, typically 3 to 4 inches deep, feature a raised front lip that keeps frames securely propped at an angle while creating a layered, dimensional display.
The construction couldn’t be simpler, making this an ideal first floating shelf project. You’ll need a board for the shelf surface, a thin strip for the front lip (usually ½ to ¾ inch tall), and standard floating shelf brackets. The shallow depth means less stress on wall anchors, and the straightforward assembly requires only basic tools and woodworking skills.
Spacing makes all the difference in achieving that curated gallery wall effect. Install ledges 12 to 18 inches apart vertically, close enough to create visual connection, far enough to avoid crowding. Three horizontal ledges spanning a wall creates dramatic impact, while a single long ledge above a sofa anchors a space beautifully.
The real magic lies in versatility. Swap artwork seasonally, rotate family photos for fresh perspective, or lean small potted plants among frames for texture. Layer smaller frames in front of larger ones for depth. This flexibility beats permanently hung art, especially for renters or anyone who loves changing their décor.
Finish your ledges in paint or stain that complements your trim work, or embrace reclaimed wood character for a more rustic gallery vibe.
8. Integrated Floating Shelf with LED Lighting
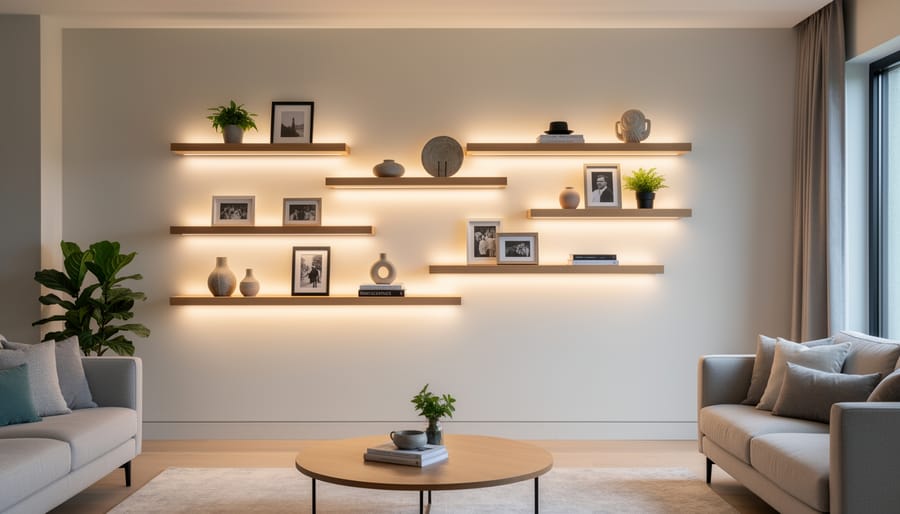
Lighting transforms floating shelves from simple storage into architectural features that create atmosphere after dark. Integrated LED strips tucked beneath your shelves cast a gentle upward glow that highlights displayed objects while creating dramatic shadow lines against the wall, an effect that adds depth and sophistication to any living room.
The beauty of this approach lies in your power options. Battery-powered LED strips have revolutionized this design element, eliminating the need for electrical work and making this a genuinely accessible DIY project. These wireless strips typically last 40-60 hours on a charge and install with simple adhesive backing. For permanent installations where you want set-it-and-forget-it functionality, hardwired low-voltage LED strips connect to a small transformer hidden behind furniture or inside the wall cavity.
Creating clean shadow lines requires positioning your LED strip about half an inch back from the shelf’s front edge. This placement prevents direct sight of the LED dots while projecting light both downward (illuminating whatever sits on the shelf below) and upward (washing the wall with ambient glow). Build a shallow channel into the underside of your shelf using a router, or simply attach a thin wooden lip along the front edge to hide the strip from view while maintaining that coveted floating appearance.
Warm white LEDs (2700-3000K) work best for living rooms, creating inviting ambiance without the clinical feel of cool white. Dimmable strips add flexibility for adjusting the mood from subtle accent lighting during movie nights to brighter task lighting when you need it.
9. Contrasting Wood Tone Geometric Arrangement
Mixing wood tones isn’t a mistake, it’s a design strategy that creates visual interest through natural contrast. Installing floating shelves in complementary species like light oak alongside dark walnut generates depth and dimension that single-tone installations simply can’t match.
The key is intentional arrangement rather than random placement. Position your darker shelves where you want to anchor the eye, typically at mid-height or flanking a focal point. Lighter woods work beautifully above and below, creating rhythm through repetition. A popular pattern alternates three walnut shelves with two oak shelves in a staggered vertical layout, establishing movement without chaos.
Color theory applies here just as it would with paint. Warm-toned woods like cherry and oak harmonize naturally, while cooler ash pairs elegantly with medium walnut. Avoid combining more than three distinct tones in one arrangement, this maintains sophistication rather than confusion.
Sustainability meets aesthetics when you source these contrasting woods responsibly. Many suppliers offer FSC-certified oak and walnut specifically for this purpose, and reclaimed materials often present beautiful tonal variation within the same species due to age and oxidation differences.
The geometric aspect comes from shelf positioning. Square and rectangular configurations feel structured, while diagonal or offset arrangements appear more dynamic. Even identical shelf sizes read as geometric art when the wood contrast is strong enough.
This approach eliminates the need for extensive styling, the shelves themselves become the statement piece, requiring only minimal objects to complete the look.
10. TV Media Wall with Surrounding Shelves
Creating a media wall with floating shelves transforms your television from a standalone black rectangle into an intentional design feature. This approach integrates technology with thoughtful display opportunities, turning what could be a visual dead zone into a curated focal point.
The symmetrical arrangement remains the most popular choice. Install matching shelves on both sides of the TV at equal heights and depths, creating a balanced framework. This works particularly well for formal living rooms where visual harmony matters. A 12-inch deep shelf above the TV provides space for a soundbar while maintaining clean lines, and shorter shelves flanking each side (8 to 10 inches deep) offer spots for speakers, plants, or decorative objects that soften the technology.
Asymmetrical designs inject more personality. Extend shelves further on one side, stagger their heights, or create an L-shape that wraps the corner. This approach works beautifully in eclectic spaces and gives you flexibility to balance the TV’s visual weight with varied shelf depths and positioning.
Cable management makes or breaks this design. Route cables through the wall before mounting shelves, or plan a vertical channel behind one shelf to conceal cords running to components. Building shelves with rear cutouts allows cables to pass through without visible clutter.
Mix media components with softer elements. Place your streaming device and router on lower shelves where function matters, then balance the technical gear with books, greenery, and natural wood accessories on upper shelves. This combination keeps the wall from feeling sterile while maintaining practical access to your equipment.
11. Curved or Arched Floating Shelves
Curved floating shelves introduce sculptural elegance that flat shelves can’t match. A gentle arc or horseshoe shape transforms functional storage into an architectural feature, drawing the eye along graceful lines while creating unexpected display possibilities around corners or in alcoves.
The traditional steam-bending approach requires a steam box and bending form but produces stunning results with solid wood strips. You’ll steam thin strips (1/8 to 1/4 inch) until pliable, clamp them over your curved form, and let them dry for several days. Stacking and gluing multiple bent strips creates the thickness needed for a shelf. White oak and ash respond particularly well to steam.
Lamination offers more control for most woodworkers. Cut thin veneer strips or repurpose pallet wood into thin slats, then glue and clamp them in layers over a curved form. This method distributes stress across the glue lines rather than the wood fibers, resulting in a stable curve that won’t spring back. You’ll need plenty of clamps and a sturdy bending form cut from plywood or MDF.
These shelves shine in contemporary and mid-century modern spaces where organic forms contrast with clean lines. Position them above seating areas or frame doorways to emphasize their unique geometry.
The mounting presents challenges, standard hidden brackets won’t follow curves. Custom steel brackets bent to match your arc, or French cleats with curved backing boards, provide necessary support while maintaining the floating illusion. This advanced project demands patience and precision, but the finished piece becomes a conversation starter that showcases serious woodworking skill.
12. Modular Pipe and Wood Hybrid Shelves
Combining industrial metal pipes with wooden shelves creates a striking hybrid system that blends raw texture with warm, natural tones. This approach works beautifully in lofts, modern farmhouses, or any living room seeking that coveted industrial-modern edge. The real genius lies in using threaded galvanized or black iron pipes, which connect with flanges and elbows to form a customizable framework that holds your shelves securely against the wall.
Start by mapping your layout on paper. Threaded pipe components come in standard lengths (6, 12, 18 inches and longer), letting you design vertical supports and horizontal brackets tailored to your exact dimensions. Flanges mount to wall studs, providing rock-solid anchoring, while the wooden shelves rest on pipe supports or slip through pre-drilled holes for a more integrated look.
Sourcing salvaged pipes from plumbing suppliers or architectural salvage yards keeps costs down and adds authentic patina. Pair them with reclaimed barn wood, scaffold boards, or rough-sawn lumber for maximum character contrast. The beauty of this modular system is its flexibility: you can reconfigure shelf heights as your needs change, add extra tiers later, or even disassemble and relocate the entire setup without permanently altering your walls.
Finish the wood with clear sealers or natural oils to let grain patterns shine against the metal’s industrial texture. Leave pipes raw for authentic aging, or seal with clear coat to prevent rust transfer. This semi-permanent system delivers the visual weight of built-ins with the adaptability DIYers crave.
Making Your Floating Shelf Vision Reality
The beauty of floating shelves lies in their accessibility across all skill levels. If you’re new to woodworking, start with straight-cut picture ledges or simple reclaimed boards with concealed brackets. As your confidence grows, progress to more complex designs like curved shelves or integrated lighting systems. The immediate visual transformation these shelves create makes them incredibly rewarding projects, whether you invest a weekend afternoon or several weeks refining details.
At Pro Makers, we believe the most meaningful furniture pieces tell stories through their materials and craftsmanship. Consider sourcing reclaimed wood from architectural salvage yards, repurposing scaffold boards, or working with local sawyers for sustainably harvested lumber. These choices connect your living room shelves to larger narratives about resourcefulness and environmental responsibility.
Don’t feel locked into copying these ideas exactly. Use them as jumping-off points for designs that reflect your space, style, and the collections you want to display. Mix elements from different concepts, adjust dimensions to fit your walls, and trust your instincts about what feels right in your home. The hands-on process of building and installing your own floating shelves delivers satisfaction that store-bought solutions simply can’t match.
Frequently Asked Questions
What’s the best depth for living room floating shelves?
For display shelves, 8-10 inches works well for most decorative items and books. Go deeper (12-14 inches) if you’re storing media components or larger objects, and shallower (3-6 inches) for picture ledges or minimalist displays.
How much weight can floating shelves actually hold?
When properly installed into wall studs with quality brackets, floating shelves can support 25-50 pounds per linear foot depending on thickness and mounting hardware. Always locate studs for heavy items and consider reinforced brackets for books or media equipment.
Can I install floating shelves without drilling into studs?
Heavy-duty drywall anchors can work for lightweight decorative items (under 10 pounds total), but stud mounting is essential for anything heavier or shelves you’ll load with books and objects. The floating effect relies on secure anchoring to look right and stay safe.
What spacing looks best between multiple floating shelves?
Vertical spacing of 12-15 inches between shelves accommodates most décor and keeps the arrangement balanced. Adjust based on what you’re displaying, taller vases or plants need more clearance, while smaller objects let you tighten spacing to 10 inches.
These questions address the practical concerns you’ll face when translating inspiration into installation. Start with one or two shelves to test your layout and spacing preferences before committing to a full wall arrangement. The beauty of floating shelves lies in their adaptability, you can always add more or adjust heights as your living room evolves.