
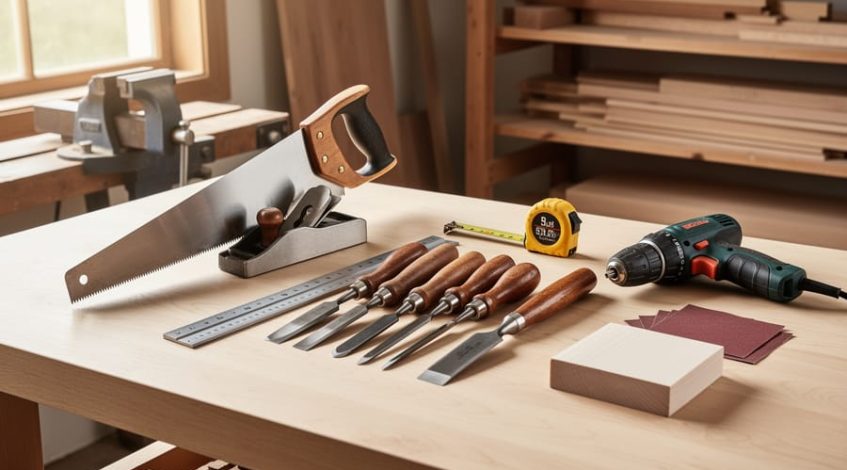
A complete starter woodworking kit requires seven essential hand tools and three power tools, costing between $250 and $400 depending on whether you buy all at once or phase your purchases over your first few projects. At minimum, you need a handsaw, combination square, block plane, chisels, hammer, tape measure, and drill, plus sandpaper and a basic workbench setup. These tools will let you build everything from simple boxes to basic furniture, cutting dovetails by hand or assembling projects with screws and dowels.
The challenge for beginners isn’t just knowing what to buy. It’s overcoming the paralysis that comes from walking into a hardware store and facing thousands of tools, each promising to be essential. I’ve watched countless aspiring woodworkers spend $800 on a table saw before they’ve ever made a single cut, or collect random tools for years without understanding how they work together. That’s backwards.
What matters is understanding that woodworking tools fall into three categories: measuring and marking, cutting and shaping, and joining. Your starter kit needs at least one tool from each category, chosen specifically to support your first three projects. Buy a quality handsaw before a circular saw. Learn to flatten wood with a plane before reaching for a power sander. Master measuring twice and cutting once with basic tools, and you’ll develop the fundamental skills that translate to every future project.
This guide breaks down exactly which tools belong in your first kit, why each one matters, how to acquire them without overspending, and what safety gear protects you from day one.
Essential Tools for Your Starter Woodworking Kit
Measuring and Marking Tools
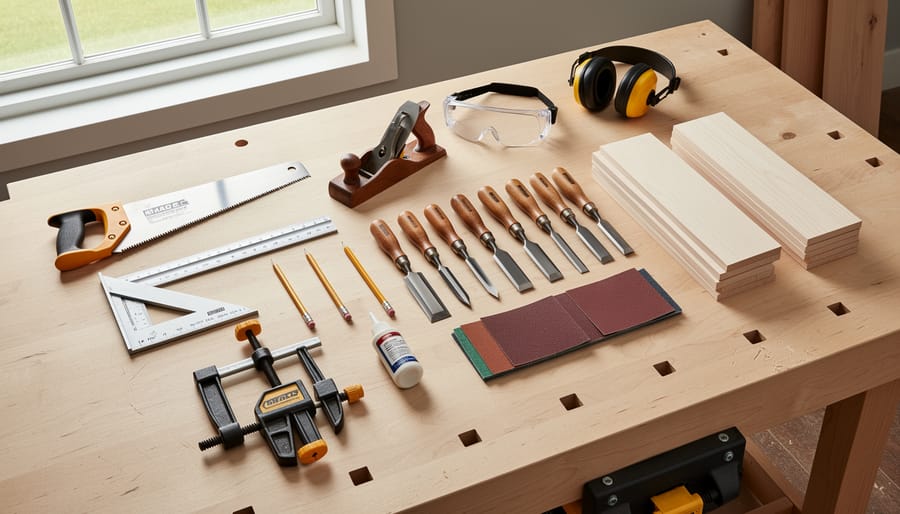
Accuracy in woodworking isn’t perfectionism, it’s the difference between parts that fit and frustration. Your measuring and marking tools determine whether your first project comes together cleanly or requires endless sanding and shimming to make work.
Start with a 25-foot tape measure that has a sturdy hook and clear markings. You’ll reach for it constantly. A combination square serves triple duty: checking right angles, marking straight lines, and measuring depths. Look for one with a machined edge, not stamped metal.
A set of sharp carpenter’s pencils beats fine-tip pens, they mark clearly on rough lumber and won’t smudge as you work. For layout work beyond basic squares, a simple marking gauge scribes parallel lines with precision that pencil-and-ruler never achieves.
Skip the chalk line initially unless you’re working with sheet goods. These five tools handle 90% of beginner measuring tasks and teach you to think dimensionally from the start.
Cutting Tools
Your cutting tools are where wood transforms from raw lumber into shaped pieces. Start with a good crosscut hand saw (around 10-12 teeth per inch) for cutting boards to length across the grain. Look for a comfortable handle and a blade that feels balanced, you’ll know when you pick it up. A rip saw (5-7 teeth per inch) cuts with the grain, but many beginners get by with just the crosscut at first.
Add a coping saw for curves and detail work. This small, U-shaped saw with a thin blade excels at intricate cuts and removing waste between dovetails. Keep extra blades on hand since they’re inexpensive and break easily during the learning curve.
A sharp utility knife handles everything from marking lines to trimming edges and shaving tight joints. Buy one with replaceable blades and keep it sharp.
As for power tools, hold off on that circular saw until you’ve mastered hand sawing. The technique you build with hand tools teaches you how wood behaves, how grain direction matters, and how to cut accurately. Once you understand those fundamentals, usually after your first few projects, a circular saw becomes a time-saver rather than a crutch. Choose corded for consistent power or battery for portability, but technique comes first.
Shaping and Smoothing Tools
A block plane is the single most transformative tool you’ll add to your starter kit. This palm-sized powerhouse smooths rough edges, adjusts door fits, and creates those satisfying wood shavings that signal you’re doing real woodworking. Look for a low-angle block plane with an adjustable blade; vintage Stanley or Record models from the 1960s-80s often outperform modern budget options and embody our sustainability values.
Your chisel set should include three or four sizes: 1/4 inch, 1/2 inch, 3/4 inch, and 1 inch. These widths handle most joinery and shaping tasks beginners encounter. Sharp chisels are non-negotiable. A dull chisel requires dangerous force and delivers poor results. Invest in a combination sharpening stone early, even if it means buying fewer chisels initially.
Round out your shaping arsenal with a mill bastard file for aggressive material removal and a half-round file for curves. Keep sandpaper in 80, 120, 150, and 220 grits. Buy quality abrasives; cheap sandpaper clogs quickly and wastes your time. These tools transform rough lumber into furniture-grade surfaces through patient, methodical work.
Assembly and Fastening Tools
A 16-ounce claw hammer remains the most versatile choice for beginners, heavy enough for cabinet work, light enough for delicate assembly. Choose one with a wooden or fiberglass handle that feels balanced in your hand.
You’ll need both Phillips and flathead screwdrivers in multiple sizes. A basic six-piece set covers most woodworking scenarios, from hinge installation to adjusting hand planes.
Clamps are where beginners should invest generously. Start with four bar clamps (at least 24 inches long) for glue-ups and two spring clamps for quick holds. You’ll use them constantly, and no project ever has enough clamps.
A corded drill with a basic bit set (1/8 to 1/2 inch) enables countless joinery techniques. Look for variable speed control and a 3/8-inch chuck. Add a countersink bit immediately, it prevents wood splitting and creates professional-looking screw joints. Quality clamps and a reliable drill will serve you for decades, making them worth the initial investment.
Safety and Finishing Essentials
Safety gear isn’t optional, it’s the foundation of every project. Start with ANSI Z87.1-rated safety glasses that fit snugly and won’t fog up during long sessions. For dust protection, invest in a proper N95 respirator or better for sanding and routing work; a basic paper mask won’t cut it for fine wood dust, which poses serious long-term respiratory risks. Understanding proper respirator use ensures you’re actually protected, not just checking a box.
Add leather work gloves for handling rough lumber and a basic first aid kit within arm’s reach. For finishing, keep mineral oil, beeswax, and sandpaper (80, 120, 220 grit) on hand, simple, non-toxic options that enhance wood’s natural beauty without harsh chemicals. These essentials cost under $60 but protect your health and elevate every project you’ll ever build.
Materials and Workspace Setup You’ll Need
Having the right materials on hand and a functional workspace makes the difference between frustration and progress. You don’t need a dedicated shop or expensive lumber stockpile to start woodworking, but you do need a few essentials and a safe place to work.
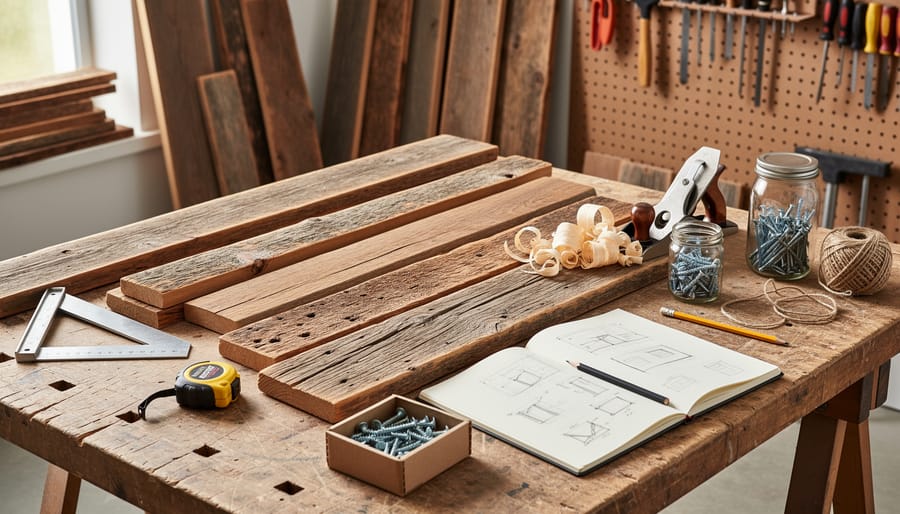
Begin with a small materials inventory: pine, poplar, or cedar boards from a home center work well for practice projects, but salvaged lumber from construction sites, salvage yards, or furniture destined for the dump offers both cost savings and sustainability. Keep a modest hardware stash: wood screws in common sizes, wood glue, sandpaper grits from 80 to 220, finish nails, and a basic wood finish like Danish oil or polyurethane. These staples cover most beginner projects without overwhelming your storage.
Your workspace needs surprisingly little square footage. A 4×8-foot area with a sturdy workbench or table, adequate lighting, and ventilation suffices for hand tool work. Apartment dwellers can use a portable workbench on a balcony or cleared living room corner, storing tools in a rolling cart. Garage setups benefit from wall-mounted tool storage and a shop vacuum for dust control. Ensure your space meets basic safety requirements similar to fireplace hearth codes which emphasize clearances and fire prevention, and understand any woodworking safety legal considerations for your living situation.
Good lighting matters more than size. Position your work area near natural light if possible, and add a task light to eliminate shadows on your cutting lines. A simple plywood workbench top over sawhorses costs less than dinner out and provides a stable surface. Start small, work safely, and expand as your skills and project ambitions grow.
Critical Safety Warnings Before You Begin
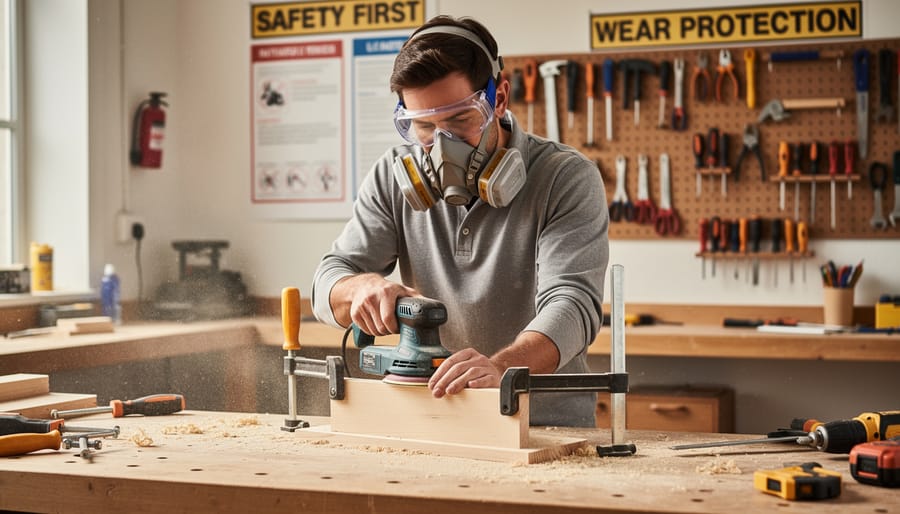
Woodworking presents real hazards that demand respect, not fear. Before you pick up your first chisel or power on a saw, establish non-negotiable safety habits that will protect you for decades to come.
Eye and Respiratory Protection Are Mandatory
Every time you work with wood, cutting, sanding, planing, or drilling, wear safety glasses with side shields. No exceptions. A single wood chip can permanently damage your eye. For respiratory protection, wear a properly fitted dust mask rated N95 or higher whenever you create sawdust or sand. The wood dust health risks are well documented, and cumulative exposure matters even when you start with pallets or softwoods that seem harmless.
Workspace Ventilation and Lighting
Work in a well-ventilated area, preferably with cross-ventilation or a fan exhausting dust outside. Poor air quality accumulates faster than you think. Equally critical is lighting. You need bright, shadow-free illumination to see cut lines clearly and avoid mistakes that lead to forcing tools.
Sharp Edge Awareness and Tool Handling
Keep both hands behind the cutting edge at all times. When using chisels or planes, secure your workpiece so it cannot move, then position your body and hands so a slip sends the blade into wood or air, never toward you. Store sharp tools with edges protected and never leave them loose on your bench where you might reach blindly.
Know When to Stop
Never work when you are tired, distracted, frustrated, or in dim light. Fatigue and rushing cause accidents. Keep a basic first aid kit with bandages, antiseptic, and gauze within reach. Safety is not about being cautious, it’s about being smart so you can keep making things for years to come.
Step-by-Step: Assembling and Organizing Your Kit
Phase 1: Core Hand Tools (Week 1-2)
Your first two weeks should focus on the tools that let you measure accurately and make basic cuts, the foundation for literally every woodworking project. Start with a 25-foot tape measure, a combination square, a pencil, and a quality crosscut hand saw. Add a utility knife for marking and trimming. This core set costs roughly £40-60 if you shop second-hand or choose mid-range new tools, and it’s enough to build simple projects like picture frames, cutting boards, or shop jigs. Practice measuring twice and cutting once with these tools before expanding your kit. Master straight cuts and square layouts now, and every future technique becomes easier.
Phase 2: Shaping and Assembly Tools (Week 3-4)
With your measuring and cutting foundation in place, Week 3-4 focuses on the tools that transform rough cuts into finished work. Start with a block plane, buy once, use forever. Test it on scrap pine; the blade should take whisper-thin shavings without chattering. Next, add three bench chisels: ¼”, ½”, and ¾” widths cover 90% of beginner joinery. Skip the fancy sets. Look for second-hand Stanley or Marples chisels at estate sales, they sharpen beautifully and cost half what new ones do.
Clamps come next, and you’ll never own enough. Begin with four 24″ bar clamps for assembly work. Add two spring clamps for quick holding tasks. Buy clamps before you think you need them; every project demands more than expected. Finally, grab a basic cordless drill if you haven’t already, plus a combination screwdriver set. Now you can shape, join, and assemble real furniture.
Phase 3: Power Tool Consideration and Storage (Month 2+)
After two months of hand tool work, you’ll know exactly which tasks slow you down. That’s when a power tool makes sense, not because it’s exciting, but because it solves a real bottleneck you’ve experienced.
Your first power tool should address your most repetitive frustration. Drilling dozens of pilot holes? A cordless drill saves hours and your wrist. Ripping boards to width repeatedly? A circular saw with a guide eliminates tedious hand-sawing. Don’t buy based on what “everyone needs”, buy what your actual projects demand.
Storage becomes critical now. Mount a pegboard or build a simple tool cabinet with designated spots for each item. Group tools by task: measuring tools together, cutting tools together, finishing supplies in one drawer. Store sharp edges in blade guards or wrapped in cardboard. Keep your most-used tools at arm’s reach and rarely-used items on higher shelves. A well-organized system means you spend time building, not searching.
Mastering Starter Woodworking Techniques with Your New Kit
Your tools mean nothing without technique. Start with measuring and marking every piece twice before cutting, use your combination square to check angles and your tape measure extended from the same reference point each time. This habit prevents the single biggest beginner mistake: cuts that don’t match your plan. Practice drawing knife lines with your marking gauge against a straight edge until you can see them clearly in any light.
Making straight cuts takes deliberate practice. Clamp a straight board to your workpiece as a guide fence, position your hand saw at a shallow angle to start the cut, and let the saw’s weight do most of the work. Three smooth strokes establish your kerf, then maintain consistent pressure and rhythm. Your muscles learn this through repetition, not reading about it.
Hand plane technique feels awkward at first. Set your block plane for a paper-thin shaving, plane with the grain direction, and keep even downward pressure as you push forward. The goal isn’t removing lots of material fast, it’s achieving a surface that needs minimal sanding. Practice on pine scraps until you can produce continuous shavings without tear-out.
Chisel work demands patience and sharp edges. For paring cuts, register the chisel bevel-down against your workpiece, use hand pressure only (no mallet yet), and remove thin layers. Your first mortise or dado will take longer than you expect. That’s normal. Watch a pallet project example to see these techniques in realistic sequence.
Drilling pilot holes prevents split wood and stripped screws. Match your drill bit diameter to two-thirds of your screw’s shaft thickness, mark your desired depth on the bit with tape, and drill perpendicular to the surface. Test on scrap first, this saves expensive project pieces.
Clamps apply pressure where you need joints to close. Position clamps directly across the joint, add cauls (scrap wood strips) to distribute pressure, and tighten until glue squeezes out slightly. Too much pressure starves the joint; too little leaves gaps. You’ll develop feel through doing, not overthinking.
Verifying Your Kit Is Complete and Testing Your Setup
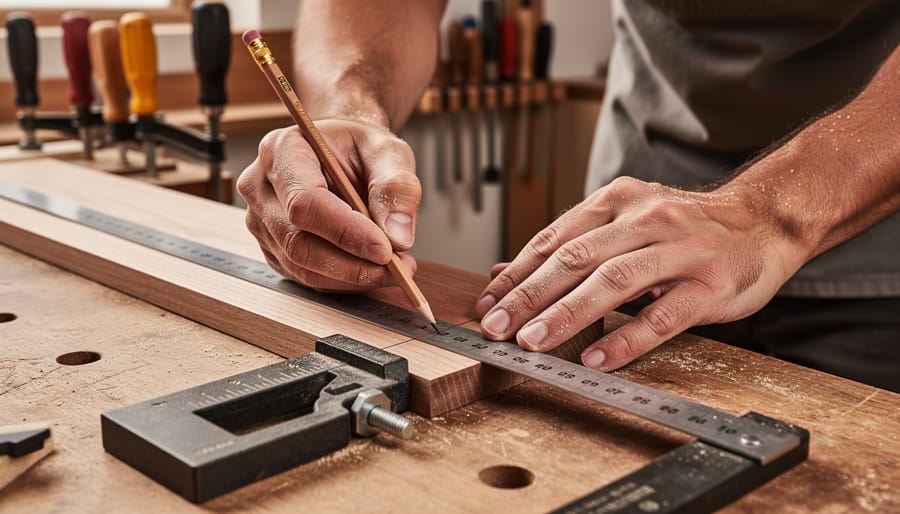
Before you dive into your first real project, take fifteen minutes to verify everything is ready. This final check prevents mid-project frustration and builds confidence.
Walk through your workspace with this checklist in hand:
- All measuring and marking tools present and accurate (test your square against a known straight edge)
- Cutting tools sharp and functional (hand saws should glide through scrap wood without binding)
- Chisels honed, plane blade adjusted and taking thin shavings
- At least four clamps in working condition with pads to protect wood surfaces
- Safety glasses, dust mask, and first aid kit within arm’s reach
- Adequate lighting from multiple angles to eliminate shadows on your work surface
- Scrap wood available for practice cuts and test assemblies
The best validation comes from building something immediately useful. A simple tool holder or sawdust brush holder makes an ideal test project. This small build reveals whether your measuring is accurate, your cuts are square, and your assembly process works. If your square reads true but your test piece comes out crooked, the issue is technique, not tools.
Common issues have straightforward fixes. Dull saw blades need sharpening or replacement. Misaligned squares get checked against a reliable reference and adjusted or replaced. Poor lighting gets supplemented with a clip-on work lamp positioned to eliminate glare.
Once your test project fits together cleanly, you’re ready for something more ambitious. A free pallet coffee table or simple storage box puts your complete kit through its paces while producing something genuinely useful. Your workspace is set, your tools are verified, and your skills are about to grow with every cut.
Frequently Asked Questions About Starter Woodworking Kits
How much should I realistically spend on a starter woodworking kit?
A solid starter kit costs between $150-$350 if you buy wisely, focusing on quality hand tools and a few essential power tools. You can cut that budget nearly in half by watching for estate sales, buying second-hand chisels and planes that just need sharpening, and prioritizing the core tools first while adding specialty items as projects demand them.
Can I start woodworking with only hand tools, or do I need power tools?
You absolutely can start with hand tools alone, and many woodworkers argue you’ll develop better technique that way. Hand saws, chisels, and a plane will handle most beginner projects; power tools simply speed up repetitive tasks once you understand the fundamentals.
What’s the real difference between cheap and expensive tools?
Cheap tools often use softer steel that dulls quickly, have poorly machined surfaces that require extensive tuning, and break under normal use. Quality tools hold an edge longer, feel balanced in your hand, and can be sharpened and repaired for decades, making them cheaper over time despite the higher upfront cost.
How do I maintain my woodworking tools so they last?
Keep cutting edges sharp through regular honing, wipe metal surfaces with a light oil after use to prevent rust, and store tools in a dry space where they won’t knock against each other. A few minutes of maintenance after each work session prevents hours of restoration later.
Where can I find salvaged or reclaimed materials for practice projects?
Check construction site dumpsters with permission, visit local salvage yards and Habitat for Humanity ReStores, and scan free sections on neighborhood apps where people often give away old furniture or leftover lumber. Pallet wood works for early projects too, though avoid chemically treated pallets and expect some extra prep work.
When should I upgrade from my starter tools to professional-grade equipment?
Upgrade a specific tool when it becomes the bottleneck in your work, when you notice its limitations affecting your results, or when a project demands precision your current tool can’t deliver. Don’t upgrade everything at once; replace tools as your skills outgrow them, which might take six months for some items and years for others.
These questions reflect what holds most beginners back from starting: fear of wasting money, confusion about what they really need, and uncertainty about where to find affordable materials. The truth is, woodworking rewards patience and resourcefulness more than a big budget. Your first kit doesn’t need to be perfect or complete. It needs to let you make sawdust, learn from mistakes, and build something with your hands. Every experienced woodworker started exactly where you are now, often with fewer resources and less available information. What matters most isn’t having the fanciest tools, it’s developing the habit of showing up to your workspace, practicing fundamental techniques, and finishing projects even when they don’t turn out as planned. The tools will improve as your skills do.
You’ve got your tools. You’ve set up your workspace. You’ve learned the fundamentals of measuring, cutting, and shaping. Now comes the best part: making something real with your own hands.
Your starter woodworking kit isn’t just a collection of tools. It’s permission to create, to experiment, and to join a tradition of makers who’ve shaped the world around them for thousands of years. Every project you complete adds to your skills. Every mistake teaches you something you’ll carry forward. Every piece of salvaged lumber you transform proves that sustainability and craftsmanship walk hand in hand.
Start simple. Build a cutting board, a shop stool, or a small box. Feel the plane slice away whisper-thin shavings. Watch your careful measurements turn into tight-fitting joints. Sand that final surface smooth and apply your first coat of finish. That satisfaction you’ll feel? That’s what keeps woodworkers coming back to the shop.
At Pro Makers, we believe accessible, environmentally conscious woodworking changes lives. It connects us to materials, to process, and to the tangible results of our effort. Your journey starts with that first cut, but where it leads is entirely up to you.
Ready for your first project? Browse our beginner project guides and discover what you can create with the kit you’ve built. Your workshop awaits.