
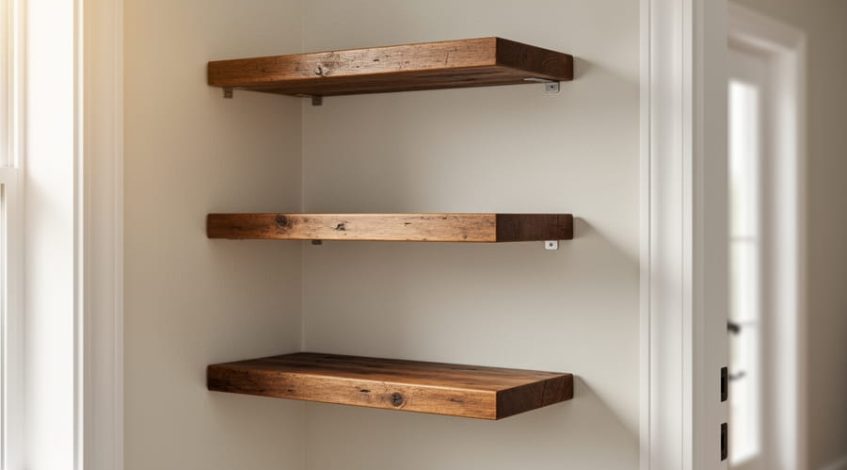
A three floating shelf layout is one of the easiest wall projects you can build in a single afternoon, and it works because three is the smallest number that creates rhythm. You can stack the shelves in a tidy vertical column, stagger them in a stepped diagonal, or pair two shelves with a single longer one for a balanced asymmetrical look. Plan on about two to three hours, basic tools, and beginner-level skill, as long as you can find your wall studs or choose the right anchors for the wall you have.
The real trick is deciding the layout before you cut or drill anything. Spacing, shelf depth, and what you plan to put on them determine whether the finished wall feels calm and intentional or crowded and accidental. Get those choices right and the build itself is straightforward.
This guide walks you through choosing a layout, gathering tools and materials, knowing when to stop and rethink for safety, building and mounting in order, and checking your work so the shelves stay level and strong. Along the way, we’ll look at how reclaimed wood can do the job beautifully. A single weathered barn board or salvaged oak offcut gives each shelf a story, keeps good timber out of the landfill, and often costs less than new lumber. Every shelf on your wall can have a past, and that’s a good reason to start building.
Choosing the Right 3-Shelf Layout for Your Wall
The Stacked Column: Clean, Classic, and Beginner-Friendly
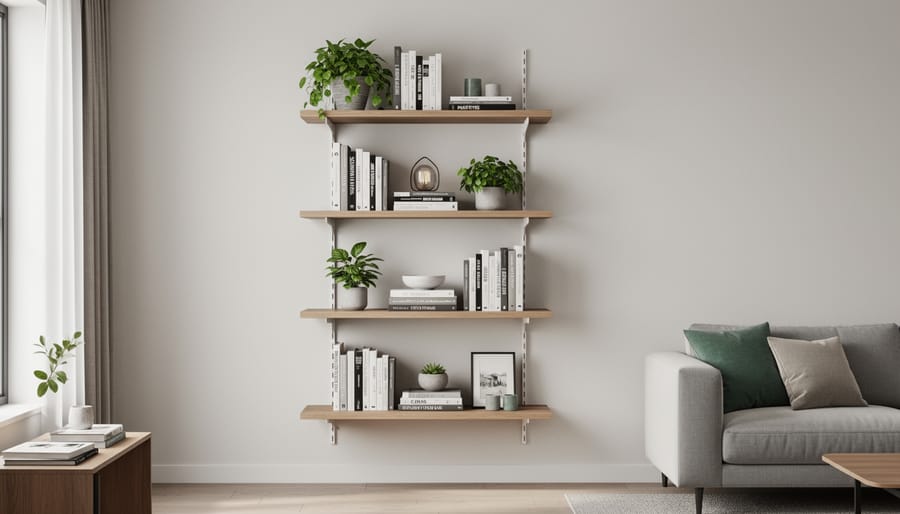
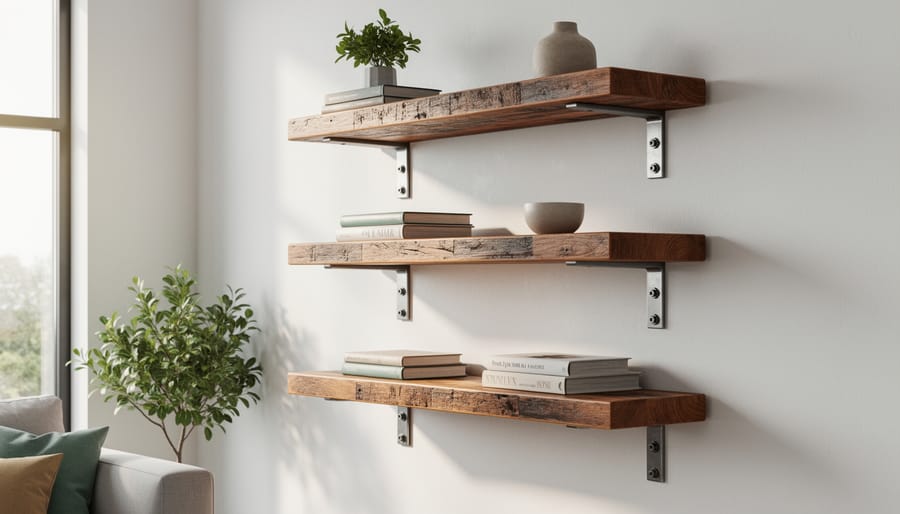
The stacked column is the layout I point every first-timer toward. Three shelves of equal length, lined up one above the other, give you a clean, classic look that’s hard to get wrong. If you’re collecting floating shelf ideas this is the quiet, dependable one that works almost anywhere.
For spacing, aim for roughly 10 to 14 inches between shelves. Closer gaps suit paperbacks, small plants, and framed photos. Wider gaps leave room for taller vases or a favorite stoneware pitcher. Because every shelf shares the same length and the same left edge, you only need one level line to guide the whole install, which is why mistakes are easy to spot and fix.
This layout shines in tight spots. Narrow walls, alcoves, and the strip of wall beside a doorway can all hold a stacked column without feeling crowded. Try 18 to 24 inches wide for those slim spaces. Keep the top shelf at or just below eye level, and the whole column will feel intentional rather than squeezed in.
The Staggered Cascade: Adding Movement to a Blank Wall
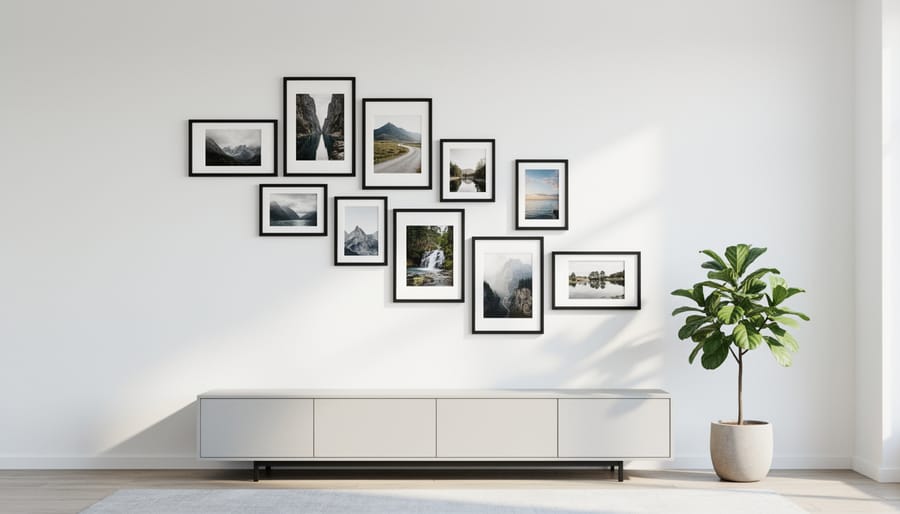
The staggered cascade is the layout that makes a blank wall feel alive. Instead of lining shelves up, you step them, so the eye travels diagonally from one board to the next. It reads as intentional and a little bit artistic, which is why it works so well as a statement piece above a sofa or beside an entryway console.
Start with variety in length. A good rhythm might be a long shelf, a medium one, then a short one, or the reverse. Try roughly 36, 28, and 20 inches. Then offset each shelf horizontally by 4 to 8 inches so they don’t stack straight up. Vertically, keep the gaps close but not identical, around 10 to 14 inches, so the sequence feels like a gentle staircase rather than a grid.
Mixing the lengths gives you room to play with your finds. A short offcut of reclaimed oak can sit happily beside a longer salvaged plank, and the difference in grain only adds to the story. Tape your layout on the wall first and step back to see if the movement feels balanced.
The Horizontal Row: Making Use of Wide Spaces
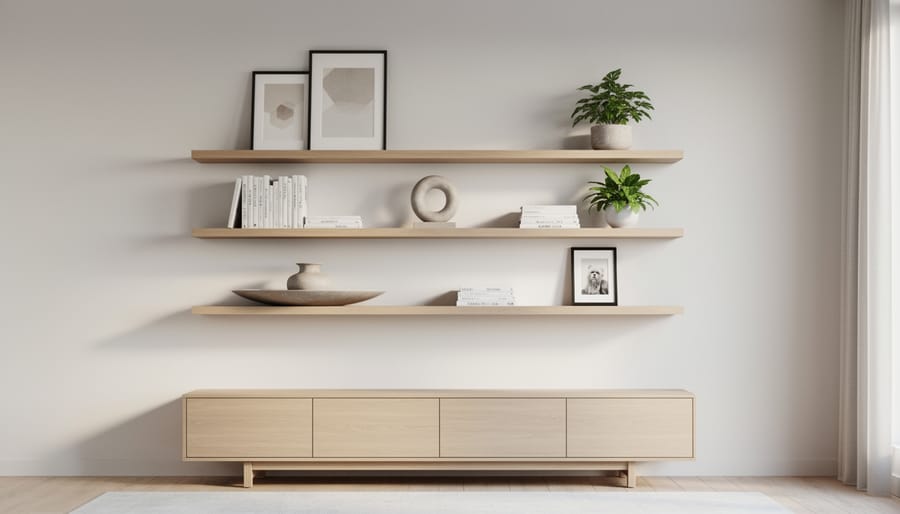
A horizontal row is the layout to reach for when you’ve got a big stretch of bare wall above a sofa, desk, or headboard. Three shelves side by side give it a calm, orderly rhythm.
The secret is consistency. Keep every shelf at the same height, and make the gaps between them identical. Cut a small spacer from scrap wood, around 4 to 6 inches wide, and use it to set each gap as you mark your lines. It’s faster and more accurate than measuring three times.
Scale matters too. As a rule of thumb, the whole group should span roughly two-thirds to three-quarters of the furniture below it. Wider than that and it dominates the room, narrower and it looks lost.
To avoid a cramped feel, leave a few inches of breathing room at both ends and don’t overload each shelf. Let some empty space do its job.
Before you touch a saw, spend ten minutes deciding. Start by measuring your wall: height, width, and the distance to any outlets, door frames, or furniture the shelves need to clear. Jot those numbers down. They’ll tell you right away whether a tall stacked column or a wide horizontal row makes more sense.
Next, think about what you actually plan to put on the shelves. A trio of paperbacks and a small plant needs very different spacing than a row of cookbooks or a favorite piece of pottery. Gather a few of those items and measure them, because their height and depth should drive your gaps.
Finally, sketch it. A rough drawing on graph paper works beautifully, and so does a paper template taped to the wall. You’ll spot awkward proportions on paper long before they become expensive mistakes in good lumber. If something looks crowded or lopsided in the sketch, nudge it and redraw. That small habit saves reclaimed boards, and your patience, down the road.
Tools and Materials for Your Floating Shelf Project
Before you cut a single board, gather your gear. The good news is that a three-shelf project doesn’t demand a full workshop, and if you’re still building up your supplies, a simple beginner woodworking kit covers most of what’s below. If you’d like a proper home base for the work, here’s how to set up your workshop on a modest budget.
Start with a few plain-language terms. A stud is the vertical wood framing member hidden inside your wall, and it’s the strongest place to anchor weight. A hidden bracket is a metal support that slides inside a hollow shelf or a drilled hole, so no hardware shows. A French cleat is a pair of interlocking boards cut at 45 degrees, one on the wall and one on the shelf, that lock together beautifully and spread the load.
Tools
- Stud finder, to locate the framing behind your drywall.
- Level, ideally 24 inches or longer for spanning a shelf.
- Drill with a few bits, for pilot holes and mounting.
- Tape measure and pencil, for marking and spacing.
- Hand saw or circular saw, to cut boards to length.
- Sander or sandpaper, for smoothing edges and grain.
Materials
- Shelf boards, three pieces cut to your chosen layout.
- Floating shelf brackets or French cleat stock.
- Wall anchors rated for your wall type, for spots with no stud.
- Screws sized to the bracket and wall.
- Low-VOC finish or water-based sealant.
Here’s where sustainability gets fun. Reclaimed lumber, salvaged barn boards, or leftover offcuts from other projects give your shelves instant character and keep good wood out of the landfill. If you buy new, look for FSC-certified boards. On a budget, a hand saw and a sanding block do the job just as well as pricey power tools.
Safety Warnings Before You Drill or Hang
A good weekend project starts with a few minutes of checking, not drilling. Before you touch the wall, run a stud finder across the area and look for wiring or plumbing. Outlets, switches, and the wall on the other side of a bathroom or kitchen are all clues that something is hiding inside. Many stud finders also detect live AC wiring, but treat that as a hint, not a guarantee.
Wear safety glasses every time you cut, sand, or drill, and add ear protection and a dust mask when the saw or sander is running. If you’re working near a fireplace or any heat source, check your local hearth codes first, since clearances for combustible wood matter.
Reclaimed wood has wonderful character, but it comes with surprises. Hidden nails and screws can wreck a blade or send fragments flying, so scan each board with a metal detector or look closely before cutting. Old paint and finishes on salvaged boards may contain lead, and sanding them creates harmful dust.
Finally, respect the limits of your wall and hardware. Drywall anchors hold far less than a screw driven into a stud, and every bracket carries a rated load. Choose hardware for the heaviest thing you plan to display, then leave yourself a comfortable margin.
Step-by-Step: Planning, Building, and Hanging Your 3 Shelves
Mapping the Layout on Your Wall
Before you cut a single board, let the wall show you what works. Painter’s tape and a few sheets of kraft paper are the cheapest design tools you’ll ever own, and they save you from filling stray drill holes later.
Cut paper to the exact length and depth of each shelf, then tape the templates up and step back. Check the spacing from across the room, from the sofa, and from the doorway, because sightlines change everything. Nudge the shelves around outlets, light switches, and the top of the TV or headboard until nothing feels crowded.
Here’s the full build sequence this preview leads into:
- Measure the wall and choose your layout.
- Mark positions with painter’s tape or paper templates.
- Cut and sand the shelf boards.
- Finish the wood.
- Locate studs and mark bracket positions.
- Install brackets or cleats level.
- Slide on or attach the shelves.
- Style and load the shelves.
Live with the tape for a day or two. If it still feels right, you’re ready to build.
Building and Finishing the Shelves
Cut your three boards to length with a handsaw or circular saw, then sand in stages, starting at 80 grit and working up to 180 for a smooth, tactile surface. Ease the edges slightly so they feel good in the hand and catch light nicely.
For the finish, choose a low-VOC hardwax oil or a water-based sealant. Both keep fumes down and cleanup easy, and they let the wood’s character shine rather than hiding it under heavy film.
I once pulled a weathered plank from a salvage pile, grey and cracked on the surface. A few passes with the sander revealed deep amber grain underneath, and one coat of oil made it glow. That same thrill of discovery comes with every free pallet project I take on, and it’s the heart of building with reclaimed wood.
Wipe on thin coats, let each cure fully, and sand lightly between them.
Mounting for a Secure, Level Hang
Start with your top shelf and work down, because every other shelf takes its spacing from that first one. Mark the bracket height, then use a stud finder to locate studs and pencil their centers. Floating shelf brackets or a French cleat should land in at least one stud wherever possible, since studs hold far more than drywall alone.
Where a stud isn’t available, choose anchors rated well above your expected load. Toggle bolts or heavy-duty drywall anchors beat the little plastic ones that come in the box.
Hold your level against the bracket, adjust, and mark the screw holes. Predrill, then drive the screws snug without overtightening. Check level again before sliding the shelf on, and once more after it’s seated.
For the lower two shelves, measure down from the top bracket instead of from the floor. Floors and ceilings rarely run true, and a consistent gap between shelves will look right even when the room doesn’t. Tape a spacer block to your level to keep every gap identical.
Checking Your Work and Making It Last
Once the last screw is tight, resist the urge to start styling. Verification comes first, and it only takes a few minutes. Lay your level on each shelf, then check across all three with a straightedge to confirm your gaps are still consistent. Press down gently on the front edge of each shelf. Any wobble, flex, or creak means a fastener isn’t biting properly.
Next, load test before you display anything precious. Add a few books at a time, wait a minute, and look for sag along the span. If a shelf dips or the wall shows hairline cracks, unload it and fix the mounting, swapping in a stud or a higher-rated anchor. Check everything again after a week, since wood settles and fasteners can loosen as it acclimates.
When everything holds, style with intention. Mix heights, leave some negative space, and put your heaviest pieces nearest the wall. Dust with a dry cloth, and refresh oiled finishes once a year to keep that reclaimed grain glowing.
Feeling confident? Build a second grouping on a neighboring wall, or make a matching trio for the hallway or bedroom. The skills carry over, and the next set always goes faster.
Common Questions About 3 Floating Shelf Layouts
Planning a three-shelf project usually raises the same handful of worries. Here are the answers beginners ask for most.
How far apart should I space three floating shelves?
A gap of about 10 to 14 inches between shelves works for most books and decor, and you can go wider if you want to display taller items. Keep the gaps identical in a stacked column or horizontal row so the arrangement feels calm and intentional.
How much weight can floating shelves hold?
It depends on the bracket, the shelf thickness, and what’s behind the wall. Screwing into studs holds far more than drywall anchors do, so check the rating on your hardware and keep heavier items on the lowest shelf.
Can I hang them without hitting a stud?
Yes, for light decor you can use rated wall anchors designed for hollow walls. For books, plants, or anything heavy, take a little extra time to find studs with a stud finder and mount directly into them.
What wood is best for a reclaimed build?
Solid hardwoods like oak, maple, and walnut resist sagging and take a finish beautifully, while reclaimed pine is lighter and easier to work. Whatever you choose, check each board for hidden nails and warping before you cut.
For a staggered cascade, choose lengths that step down in a pleasing rhythm, such as 36, 30, and 24 inches. A noticeable difference between shelves reads as deliberate, while lengths that are only an inch or two apart tend to look like a mistake. Tape paper templates on the wall first, step back, and trust your eye before you pick up a saw.
Three floating shelves might look like a small project, but they’re one of the friendliest ways into DIY Floating Shelves Design. You’ve got a stacked column for narrow walls, a staggered cascade for a bit of movement, and a horizontal row for wide spaces. Pick the one that fits your wall and what you want to display, then tape it out, check your studs, and take it one step at a time.
Start simple. Your first set doesn’t need to be perfect, and every level, secure shelf teaches you something you’ll carry into the next build.
If you can, reach for reclaimed boards, barn wood, or offcuts that would otherwise be tossed. Those old nail holes and weathered grain carry history, and they turn a plain shelf into a story worth telling.
When you finish, I’d love to see your shelves and hear where your wood came from. Build something that lasts, and let salvaged materials do the talking.